> ## Documentation Index
> Fetch the complete documentation index at: https://nango-wari-migrated-bigcommerce-docs.mintlify.site/llms.txt
> Use this file to discover all available pages before exploring further.
# SentinelOne (API Token) - How do I link my account?
# Overview
To authenticate with SentinelOne, you will need:
1. **API Token** — An API token created for a dedicated SentinelOne service user.
2. **Hostname** — The hostname of your SentinelOne management console, for example `your-tenant.sentinelone.net`.
This guide will walk you through generating an API token and finding your SentinelOne management console hostname.
### Prerequisites
* Create a dedicated service user with scoped access to the resources you want to query through Nango.
* Record the token scope, role, and expiry if one is set when you create the token.
### Instructions
#### Step 1: Generate your API token
1. In your SentinelOne admin console, open **Settings**.
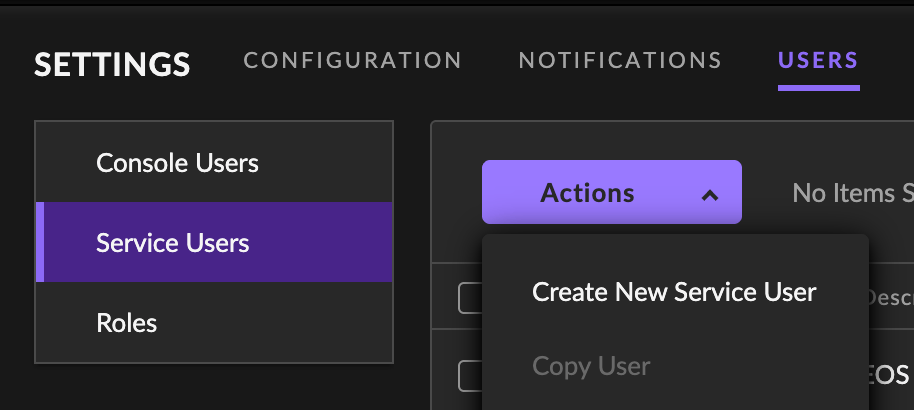
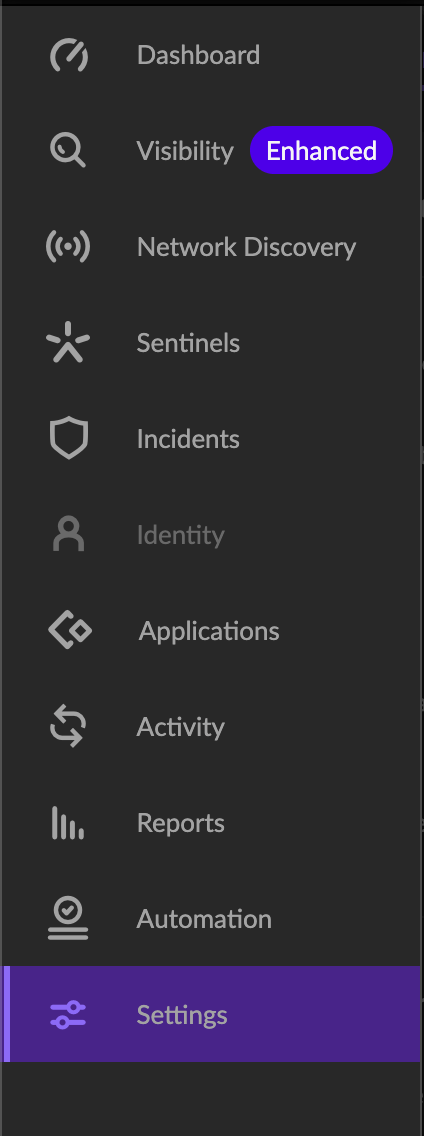 2. Select **Users** -> **Service Users**, open **Actions**, and click **Create New Service User**.
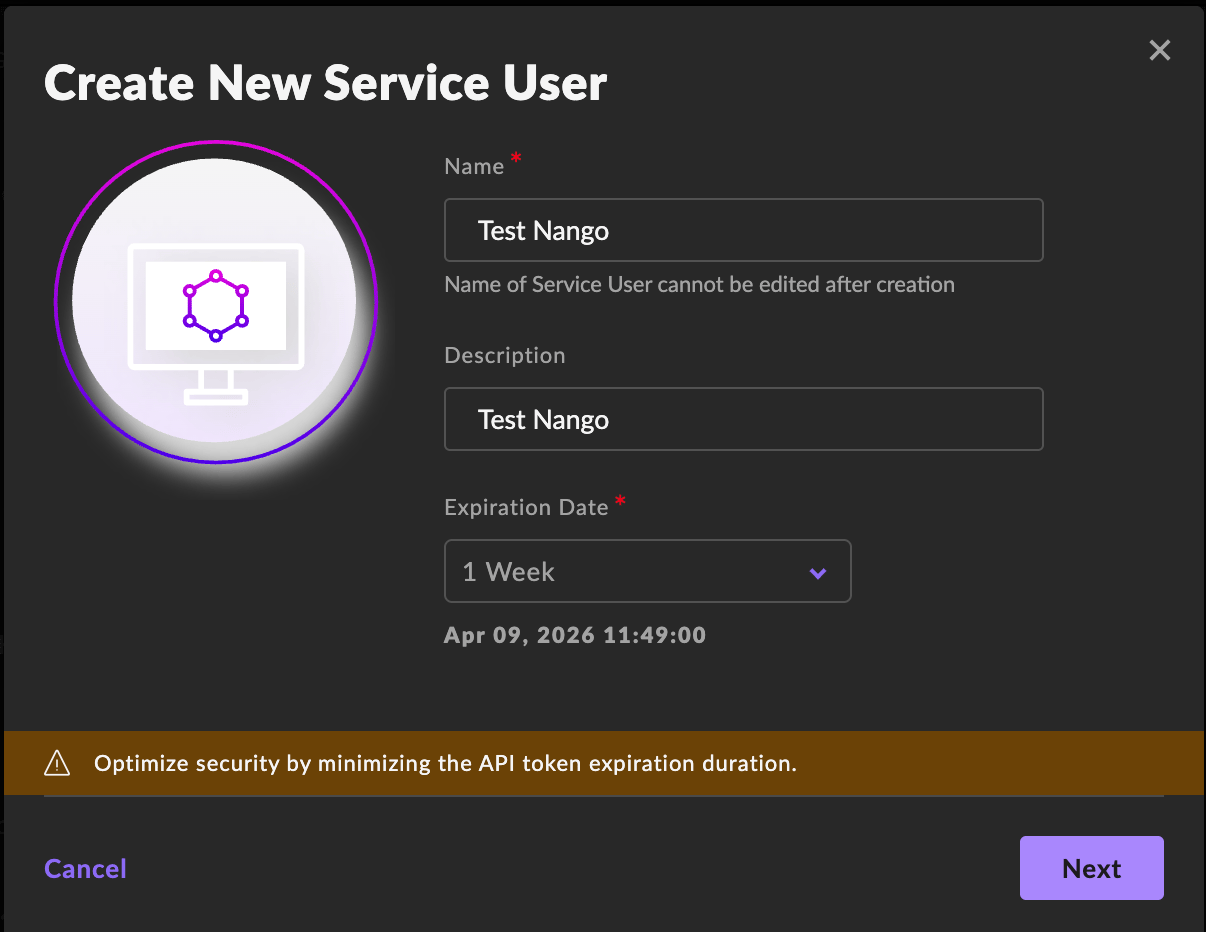
 3. Enter a name and optional description for your dedicated Nango service user. Set an expiration date if your security policy requires one, or leave it unset if you want a non-expiring service-user token.
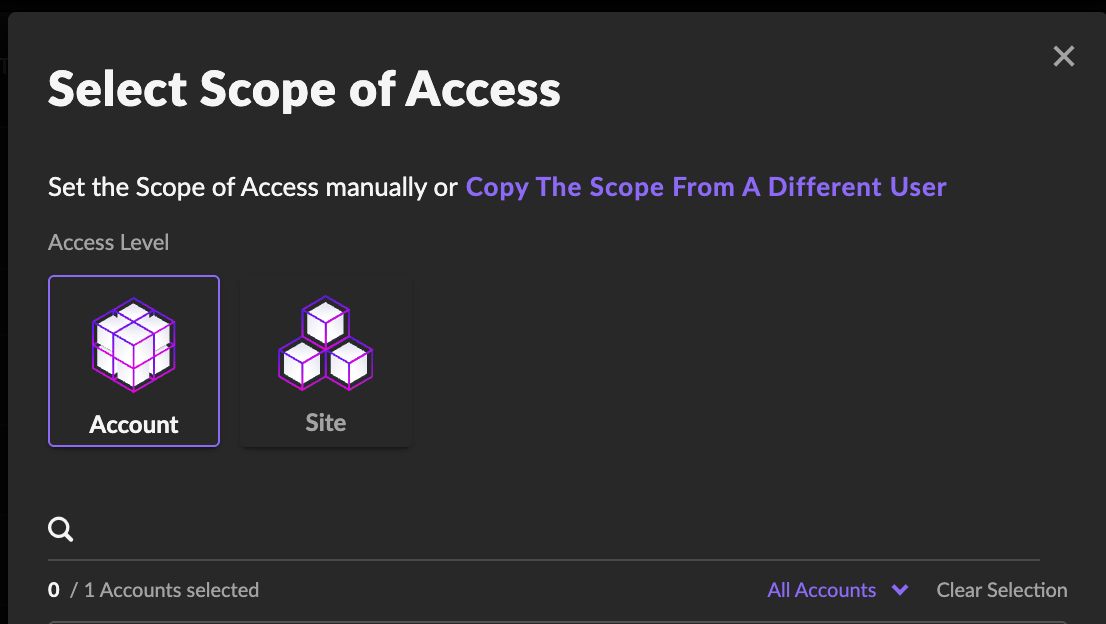
 4. Select the smallest account or site scope and role that still allow your verification request and API reads to succeed.
 5. Copy the API token shown after creating the service user and record its expiry if one is set. You won't be able to view that same token again after creation.
SentinelOne's official docs say the API docs are tenant-specific and available from **Help** -> **API Doc** inside the management console. Use that page to confirm the latest API version your tenant exposes.
#### Step 2: Find your hostname
1. Sign in to your SentinelOne tenant.
2. Copy the hostname from your browser URL.
The exact SentinelOne admin menus can vary by tenant version and cloud region. The hostname you need is the same hostname you use to open the management console.
#### Step 3: Enter your credentials in the Connect UI
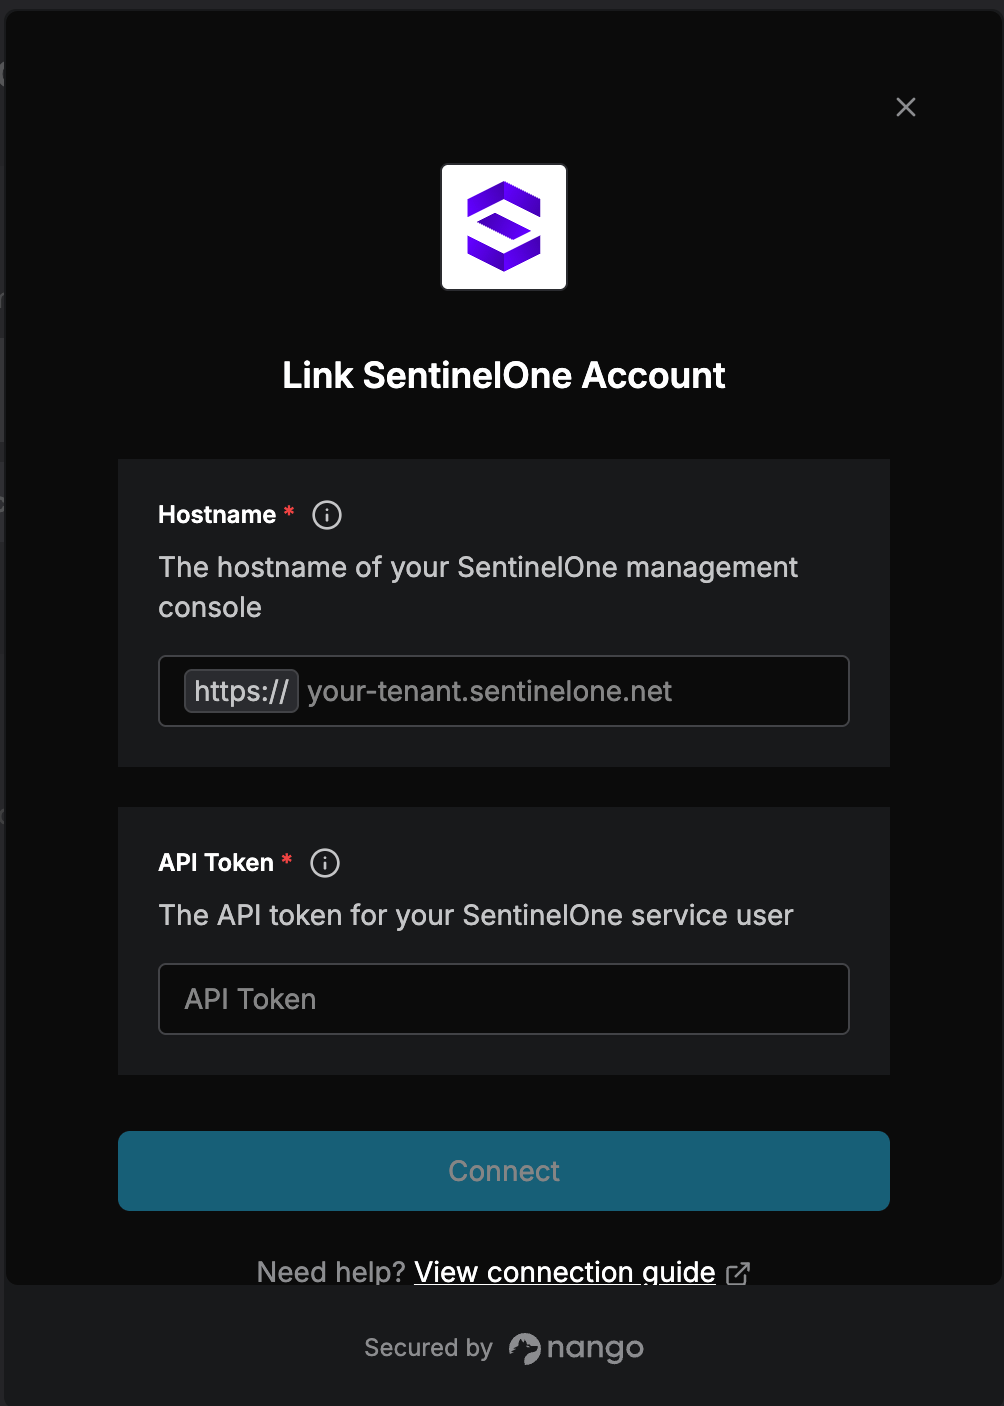
Once you have your **Hostname** and **API Token**:
1. Open the SentinelOne connection form in Nango.
2. Enter the **Hostname** without `https://`.
3. Enter the **API Token**.
4. Submit the form to create the connection.
5. Copy the API token shown after creating the service user and record its expiry if one is set. You won't be able to view that same token again after creation.
SentinelOne's official docs say the API docs are tenant-specific and available from **Help** -> **API Doc** inside the management console. Use that page to confirm the latest API version your tenant exposes.
#### Step 2: Find your hostname
1. Sign in to your SentinelOne tenant.
2. Copy the hostname from your browser URL.
The exact SentinelOne admin menus can vary by tenant version and cloud region. The hostname you need is the same hostname you use to open the management console.
#### Step 3: Enter your credentials in the Connect UI
Once you have your **Hostname** and **API Token**:
1. Open the SentinelOne connection form in Nango.
2. Enter the **Hostname** without `https://`.
3. Enter the **API Token**.
4. Submit the form to create the connection.
 You are now connected to SentinelOne.