

Overview
To authenticate with ServiceNow using Client Credentials, you need:- Domain - Your ServiceNow instance’s full hostname (e.g.,
dev12345.service-now.com). - Client ID - The unique identifier for your OAuth application.
- Client Secret - A confidential key used to authenticate the application.
Prerequisites:
- You must have a ServiceNow instance (Washington DC release or later)
- You must have admin access to configure OAuth settings
- These plugins must be active on your instance:
OAuth 2.0(com.snc.platform.security.oauth),REST API Provider(com.glide.rest),Authentication scope(com.glide.auth.scope), andREST API Auth Scope Plugin(com.glide.rest.auth.scope)
Instructions:
Step 1: Enable Client Credentials Grant Type
Client Credentials must be enabled at the instance level:- In ServiceNow, navigate to sys_properties.list (this won’t appear under the “All” menu - type it in the navigation filter and press Enter to be redirected).
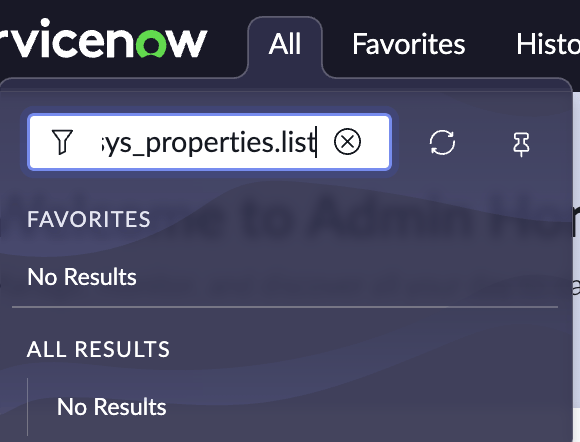
- Search for
glide.oauth.inbound.client.credential.grant_type.enabled.
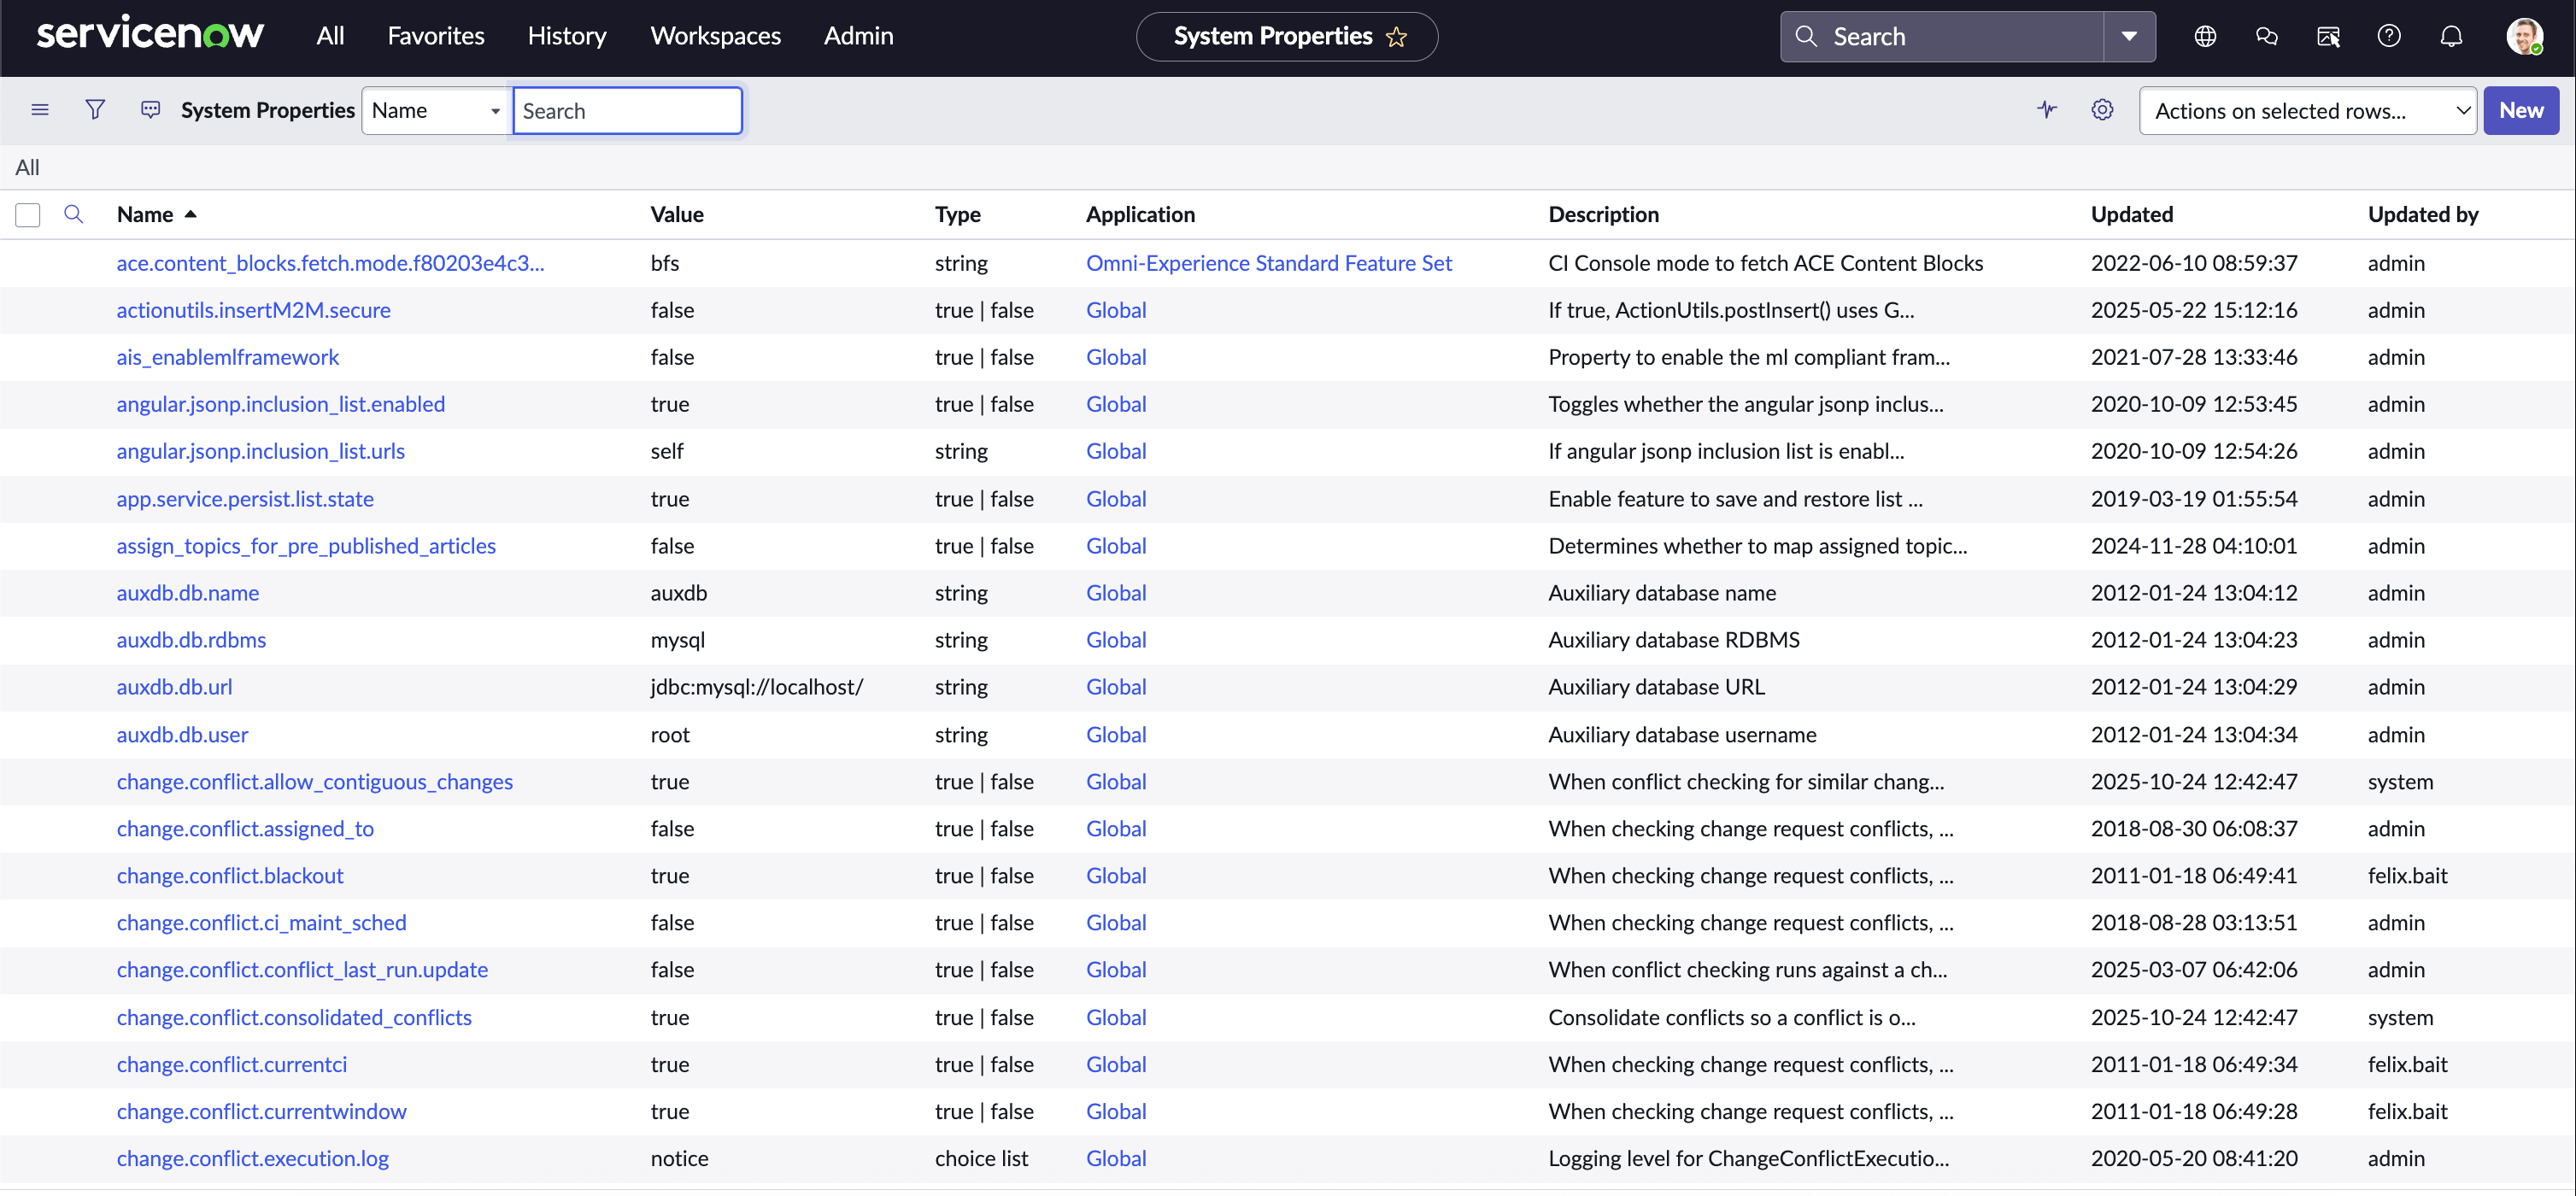
- If it doesn’t exist, click New and create it:
- Name:
glide.oauth.inbound.client.credential.grant_type.enabled - Type:
true | false - Value:
true
- Name:
- Click Save.
Step 2: Create an OAuth Application User
This is the service account identity that API calls will be made as:- Navigate to User Administration > Users.
- Click New and configure:
- User ID:
nango_integration(or your preferred name) - First name:
Nango - Last name:
Integration - Active: Checked
- Web service access only: Checked (recommended)
- User ID:
- Click Submit.
- Open the newly created user and go to the Roles tab.
- Click Edit and add these roles:
rest_service- Required for REST API accessitil- Required for incident/change request creation
- Click Save.
Step 3: Create an API Authentication Scope (optional but recommended)
This step restricts the application’s access to a specific API rather than granting broad access. You can skip it if you don’t need that level of control.- Navigate to System OAuth > REST API Auth Scope.
- Click New and configure:
- Name:
nango_api_access - Active: Checked
- REST API:
Table APIor whichever API you need to target. - REST API PATH:
now/table - Check: Apply auth scope to all HTTP methods in this API
- Name:
- Click Submit.
Step 4: Create an OAuth Application
- Navigate to System OAuth > Application Registry.
- Click New > Create an OAuth API endpoint for external clients.
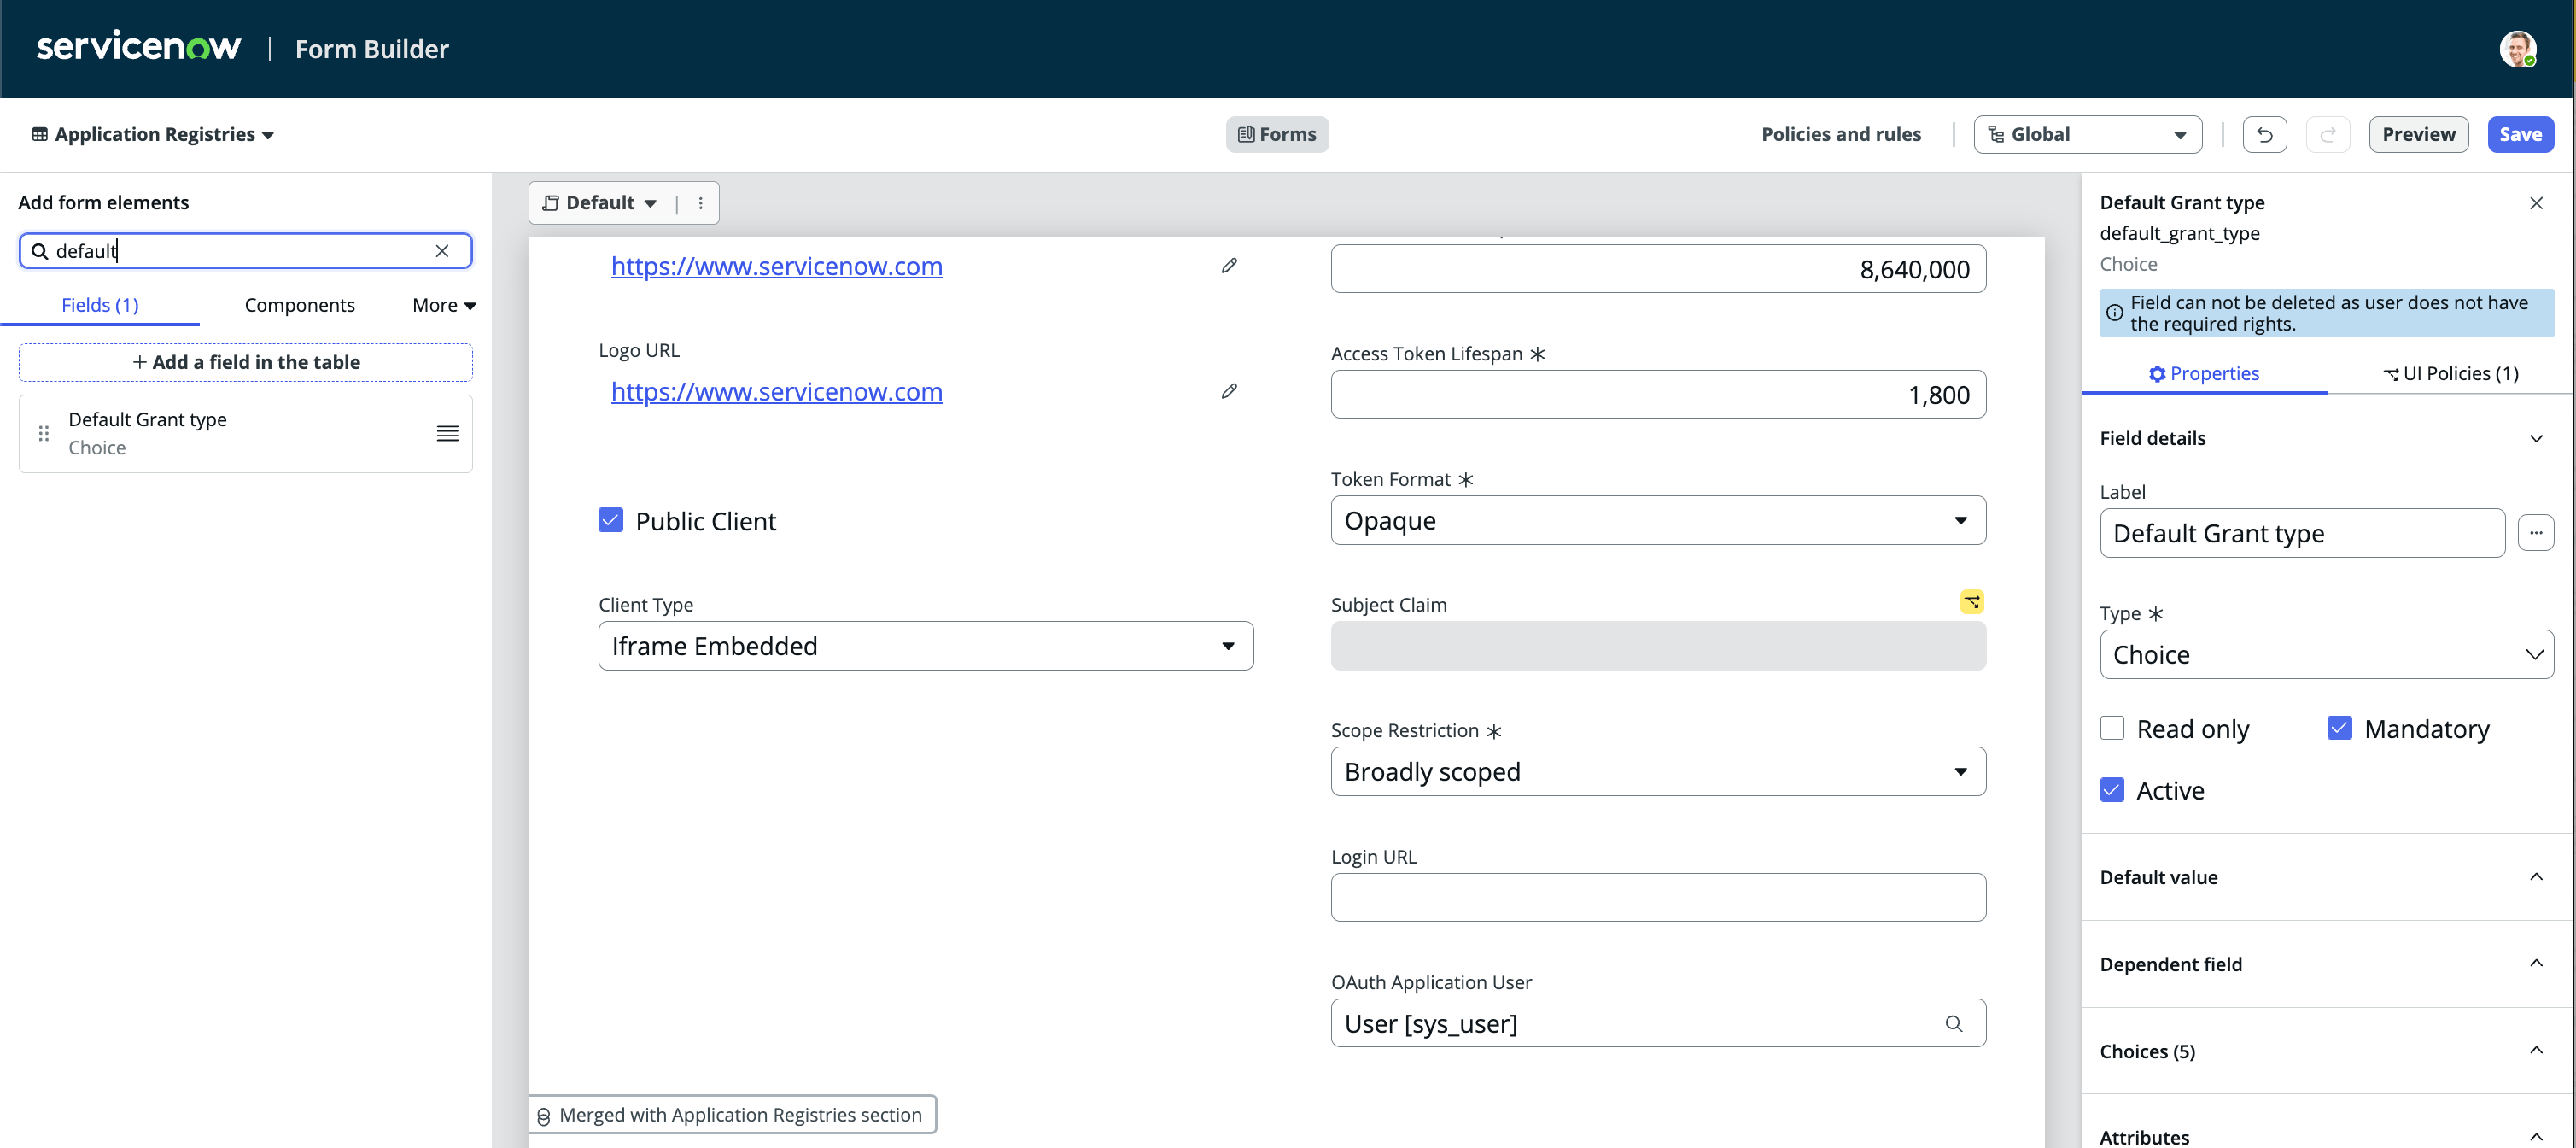
- Important: The default form view doesn’t show all required fields. To add them:
- Click on the burger icon next to “Application Registries”
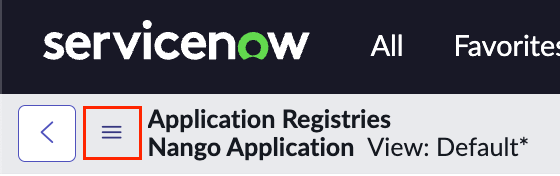
- Select Configure > Form Builder
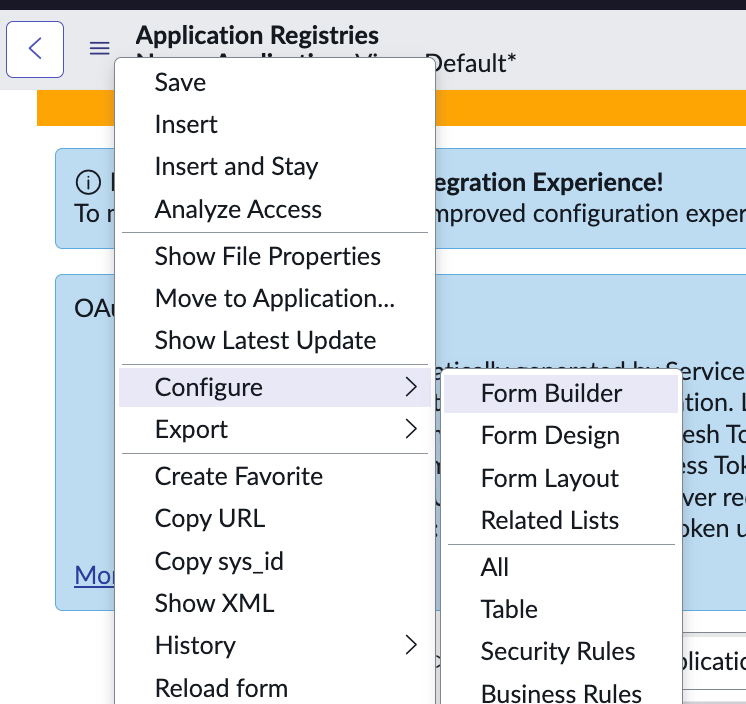
- Add the OAuth Application User and Default Grant Type fields to the form
- Save the form layout
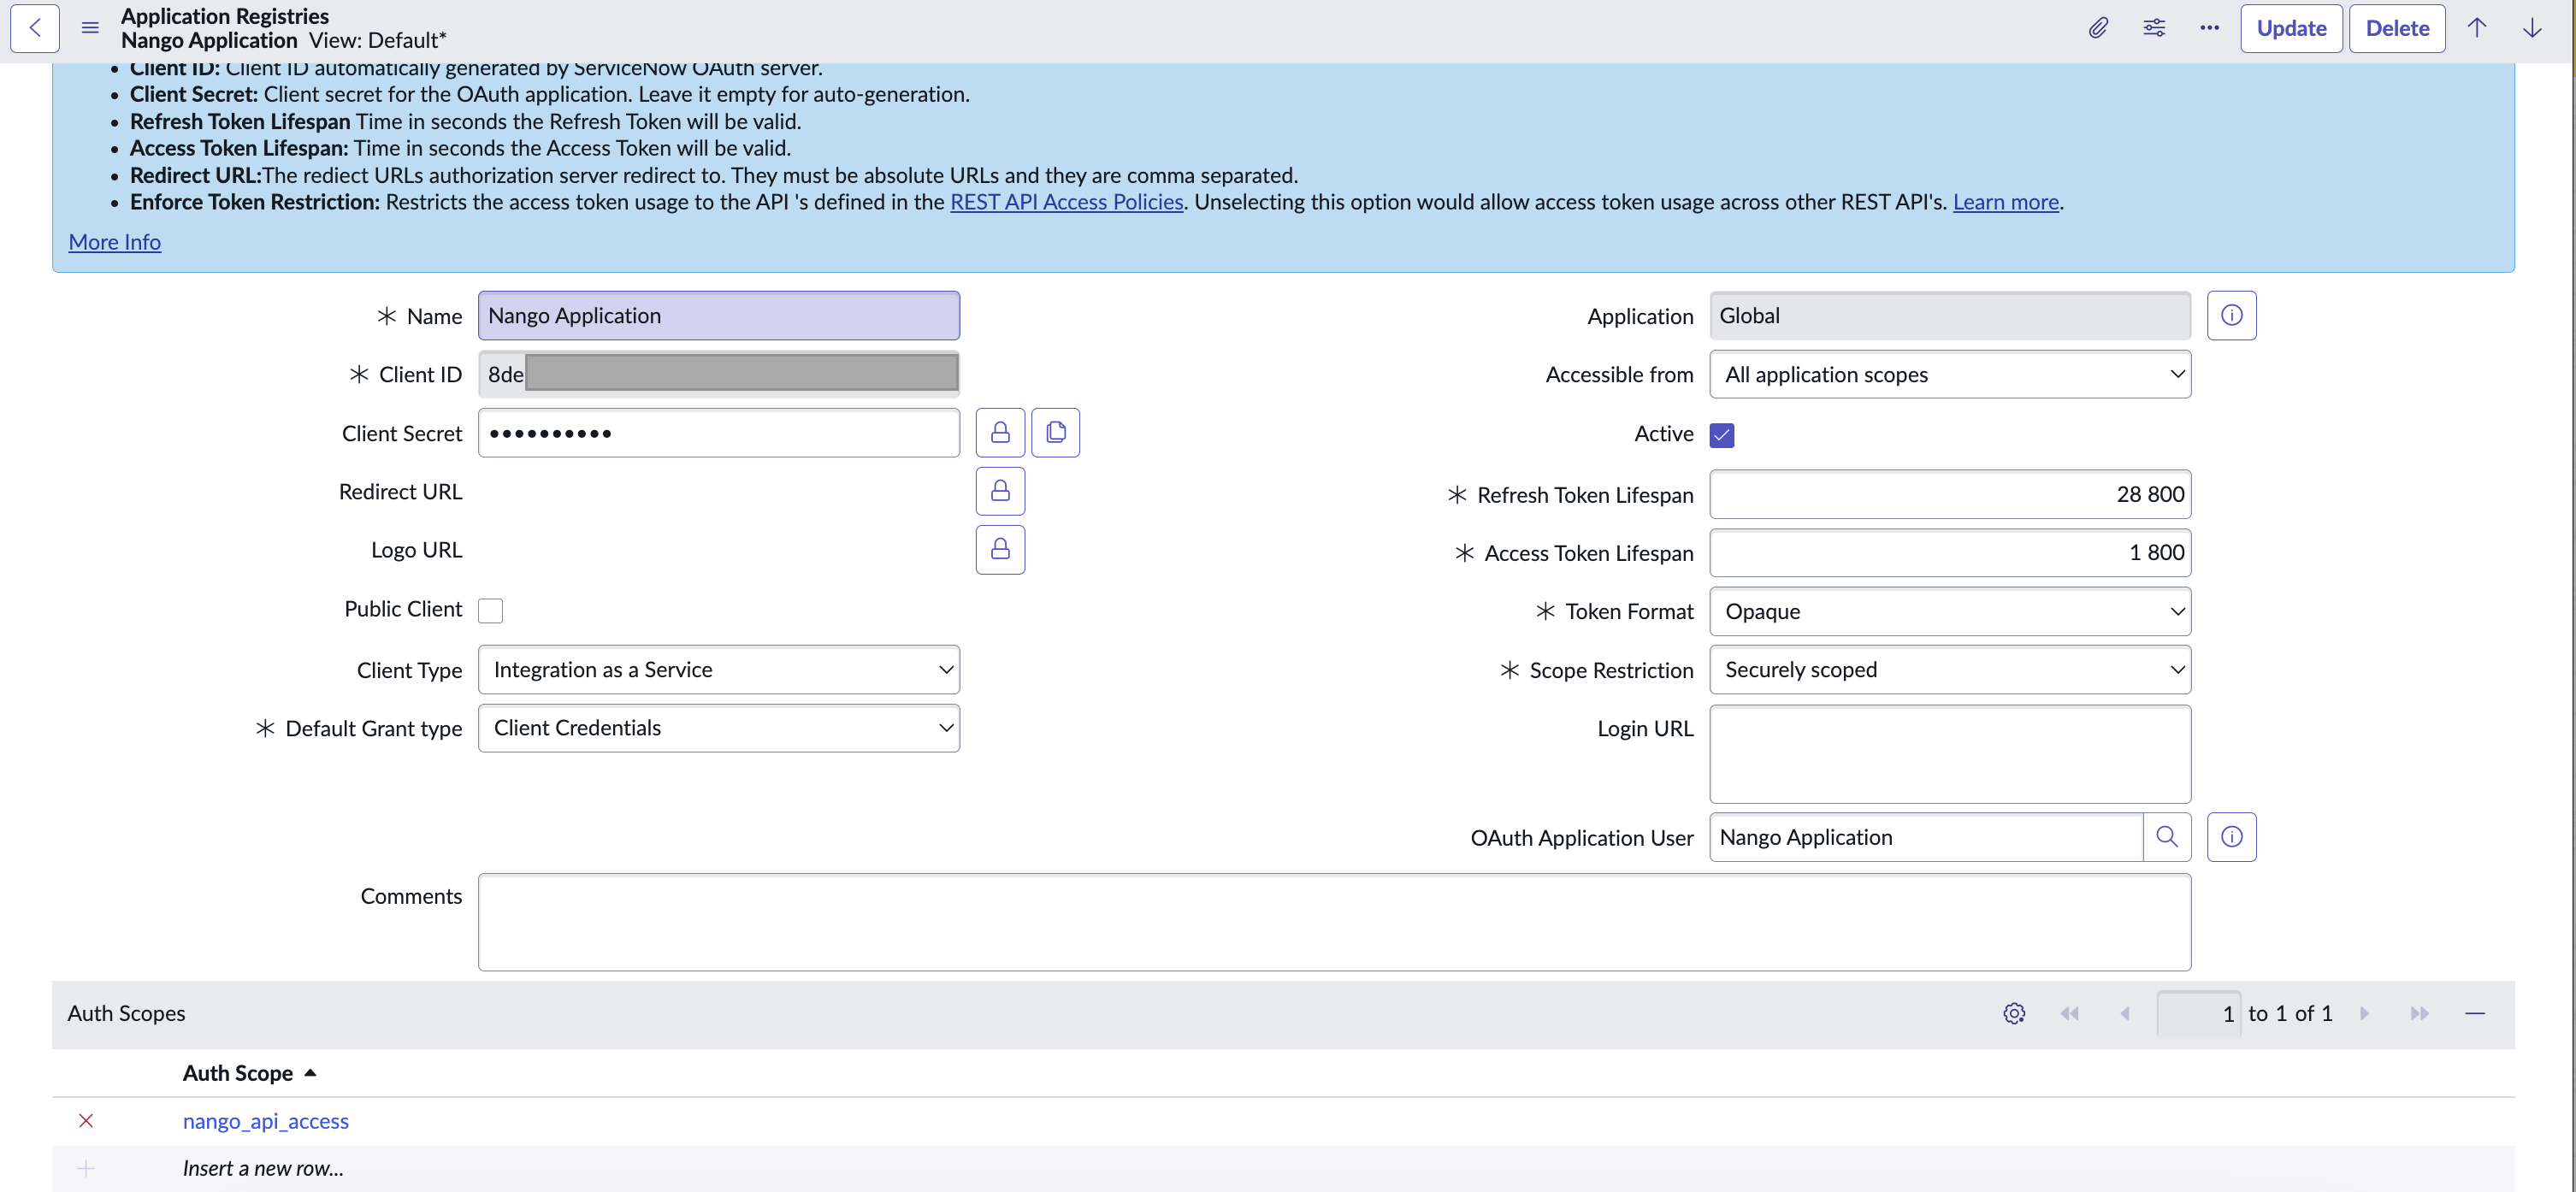
- Configure the application:
- Name:
Nango Integration - Client ID: Auto-generated (copy this)
- Client Secret: Click the lock icon to reveal, then copy
- Default Grant Type:
Client Credentials - OAuth Application User: Select the user created in Step 2
- Public Client: Unchecked/
false— this grant type requires a confidential client - Active: Checked
- Redirect URL and Login URL: leave blank, they’re not used by the Client Credentials grant type
- Name:
- Click Submit.
- If you created an API Authentication Scope in Step 3, open the application, go to the Auth Scopes related list, click Add, select that scope, then Save.
Step 5: Enter credentials in the Connect UI
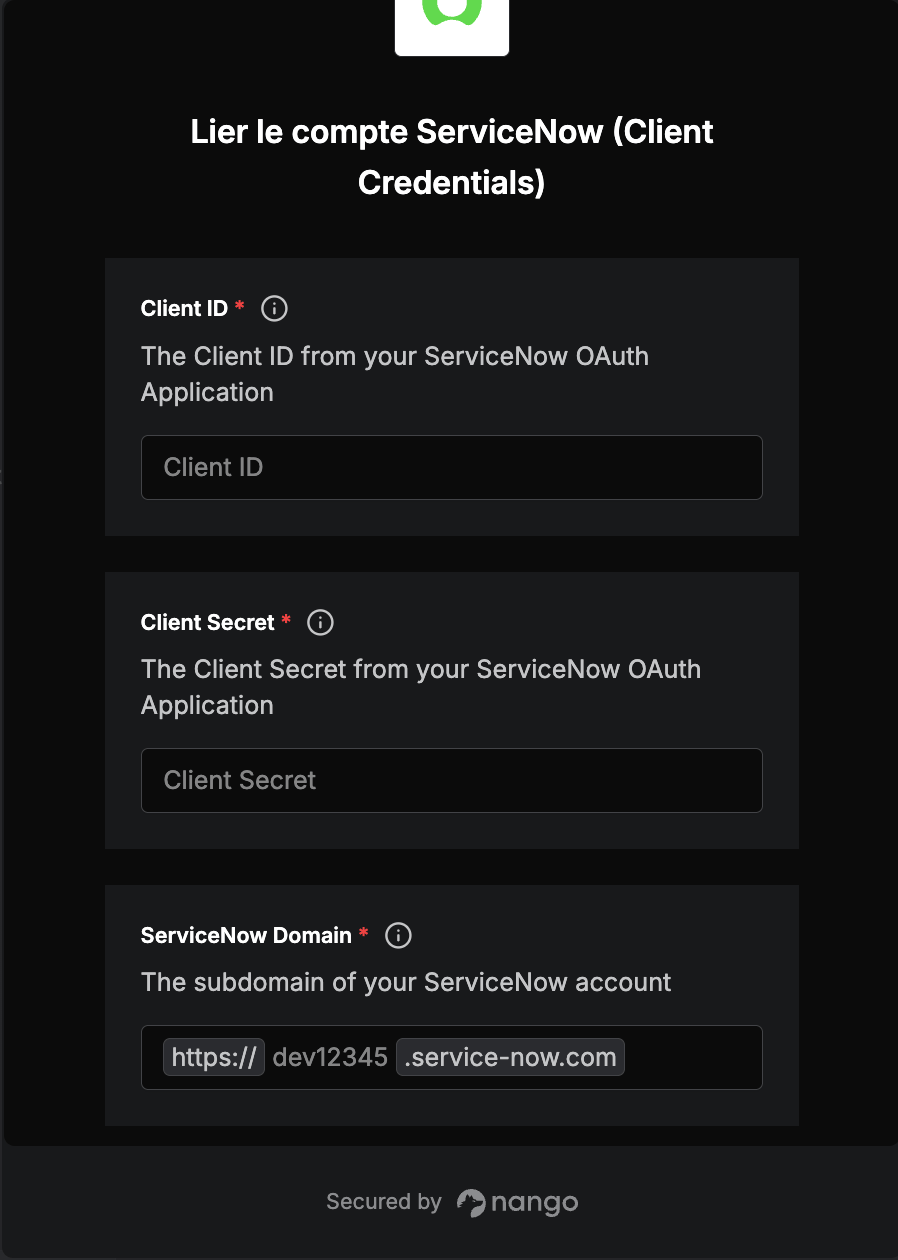
Once you have your credentials:- Open the form where you need to authenticate with ServiceNow.
- Enter your Domain (e.g.,
dev12345.service-now.com), Client ID, and Client Secret in their designated fields.
- Submit the form, and you should be successfully authenticated.