> ## Documentation Index
> Fetch the complete documentation index at: https://nango-wari-migrated-bigcommerce-docs.mintlify.site/llms.txt
> Use this file to discover all available pages before exploring further.
# Atlassian Cloud Admin - How do I link my account?
# Overview
To authenticate with Atlassian Cloud Admin, you will need:
1. **API Key** - A key that grants Nango permission to interact with Atlassian Cloud Admin APIs resources and services.
2. **Organization ID** - ID that is associated with your Atlassian organization. This is optional.
This guide will walk you through generating your **API Key** and finding your **Organization ID** within Atlassian.
### Prerequisites:
* You must have an account with Atlassian.
#### Step 1 Generating your API Key
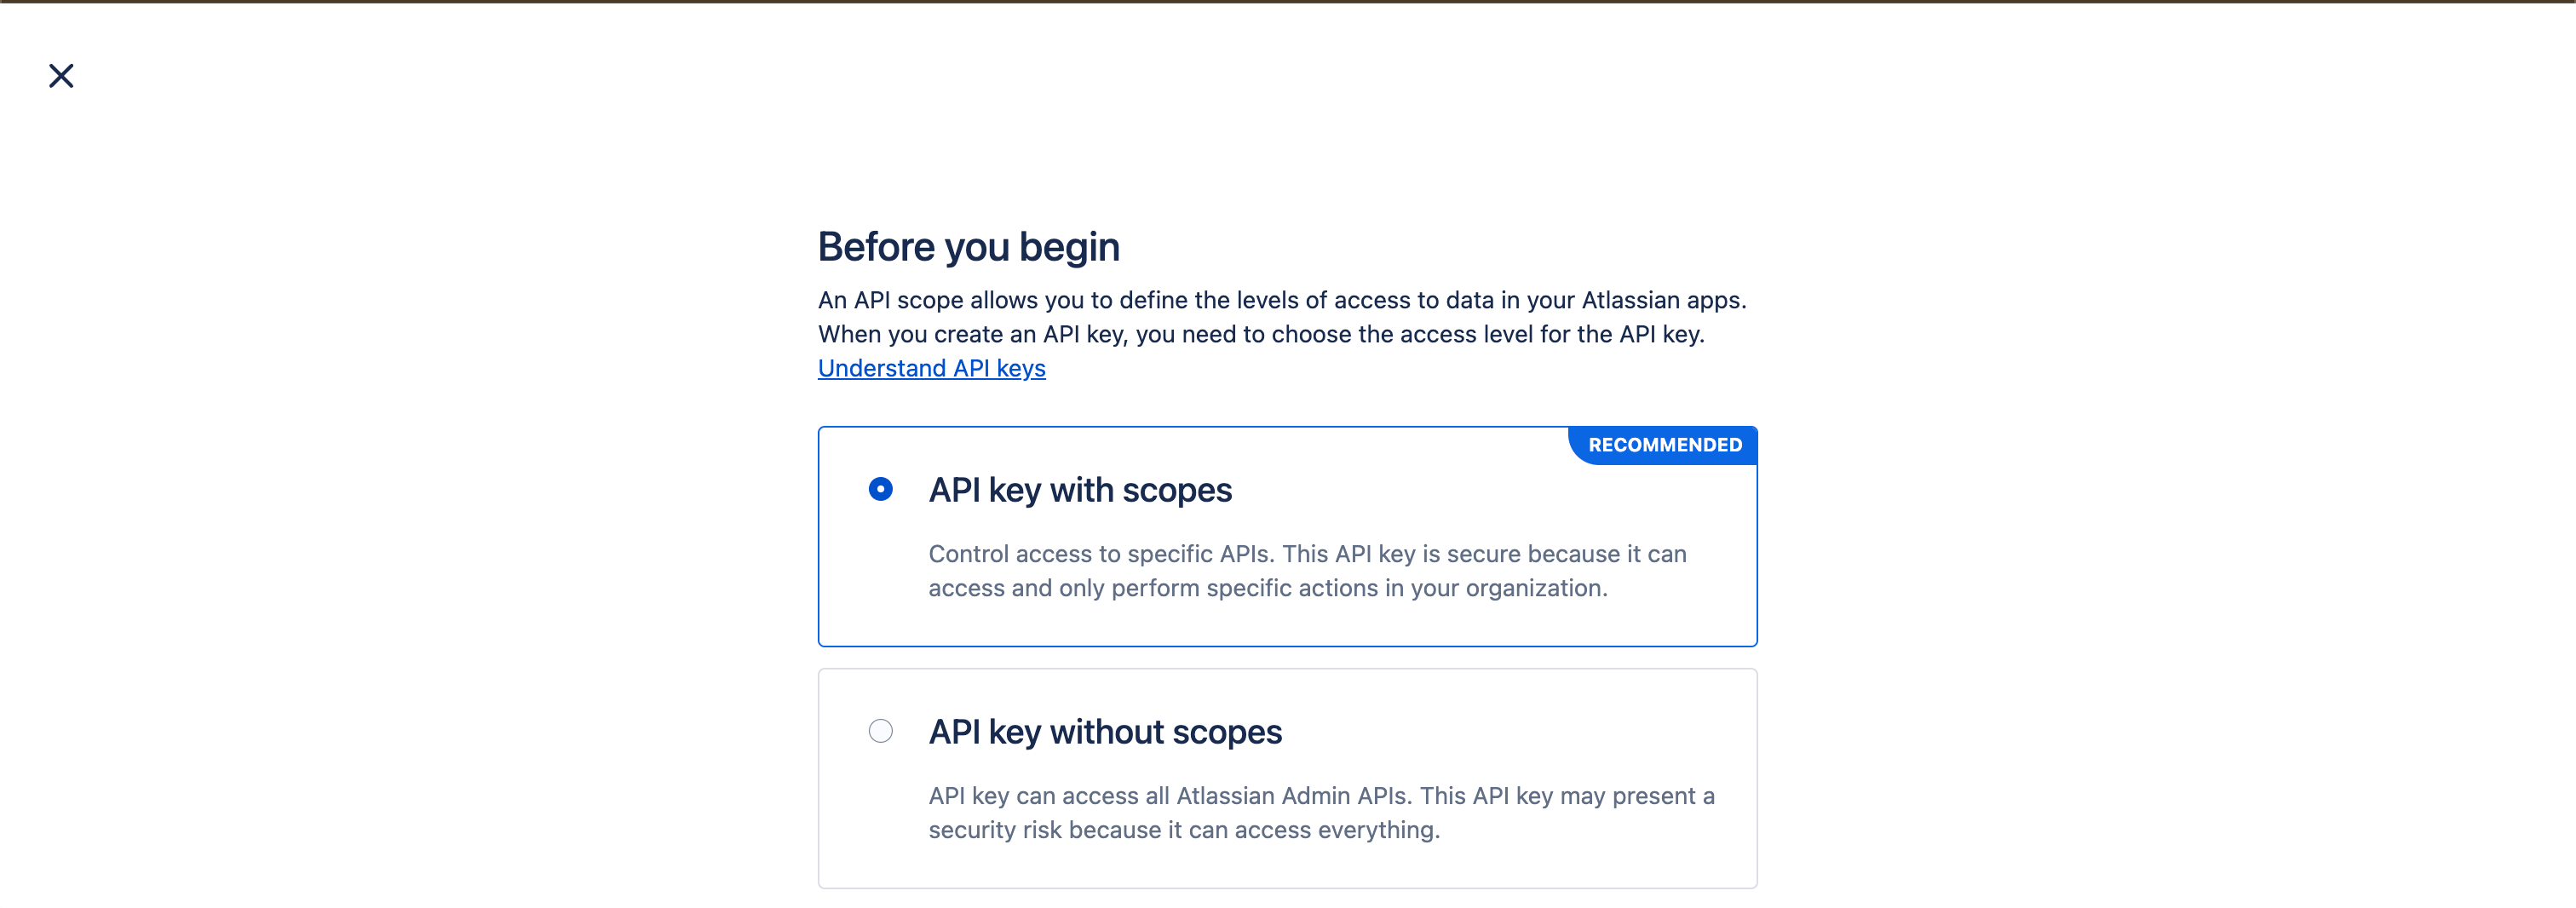
* To authenticate with Atlassian Cloud Admin APIs, you’ll need to generate an API key. You can choose between:
- **API key with scopes** – More secure, allows fine-grained access control.
- **API key without scopes** – Broader access, potentially less secure.
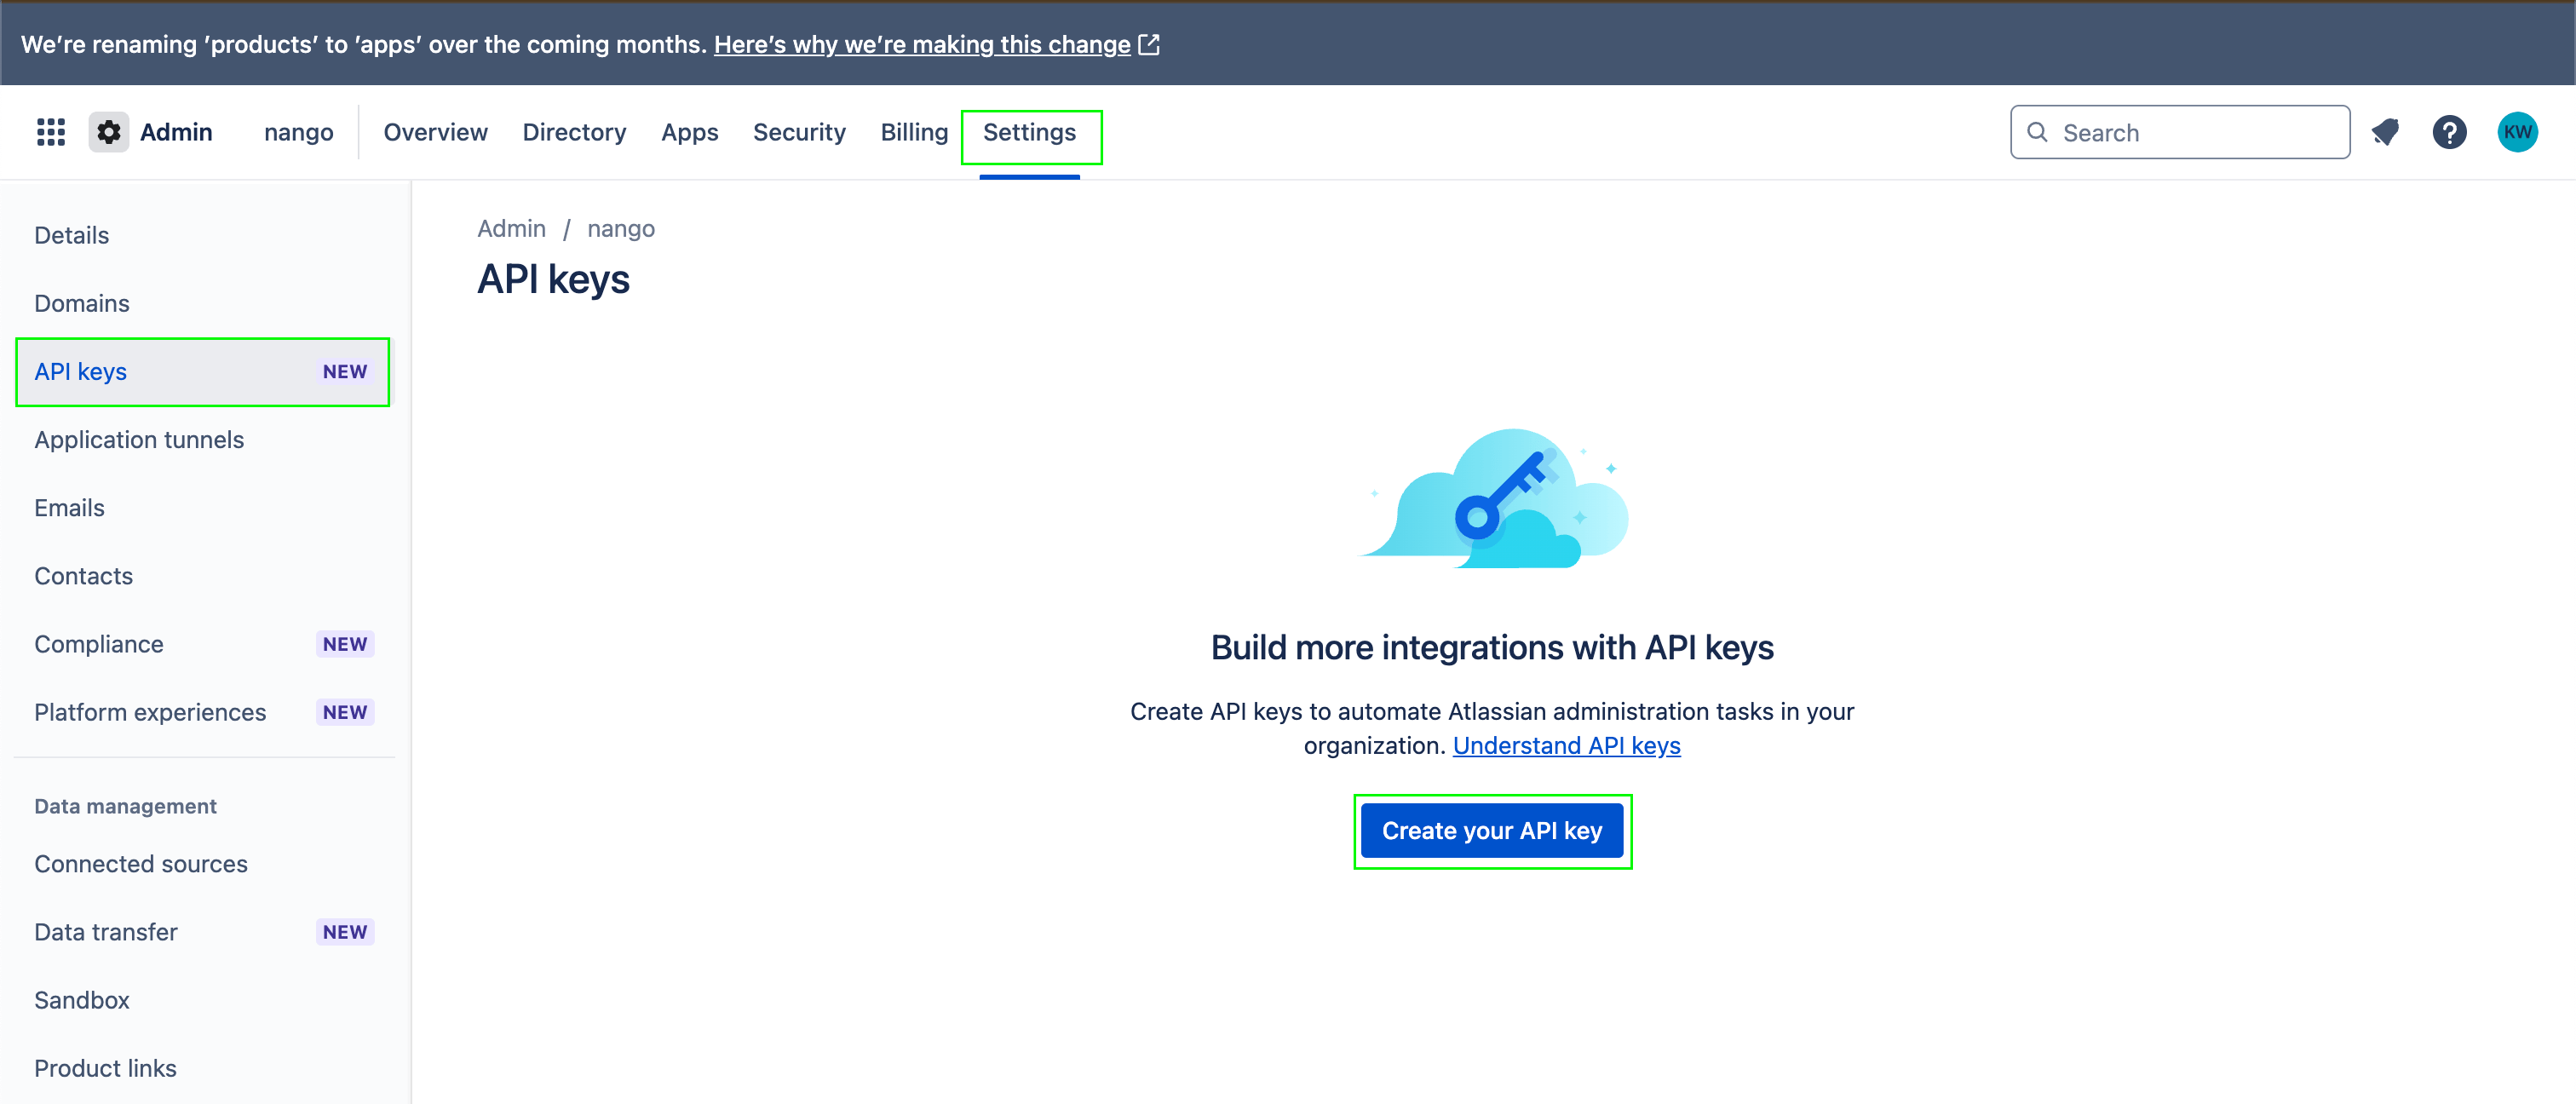
1. Go to [https://admin.atlassian.com](https://admin.atlassian.com).
2. Select your organization (if you have more than one).
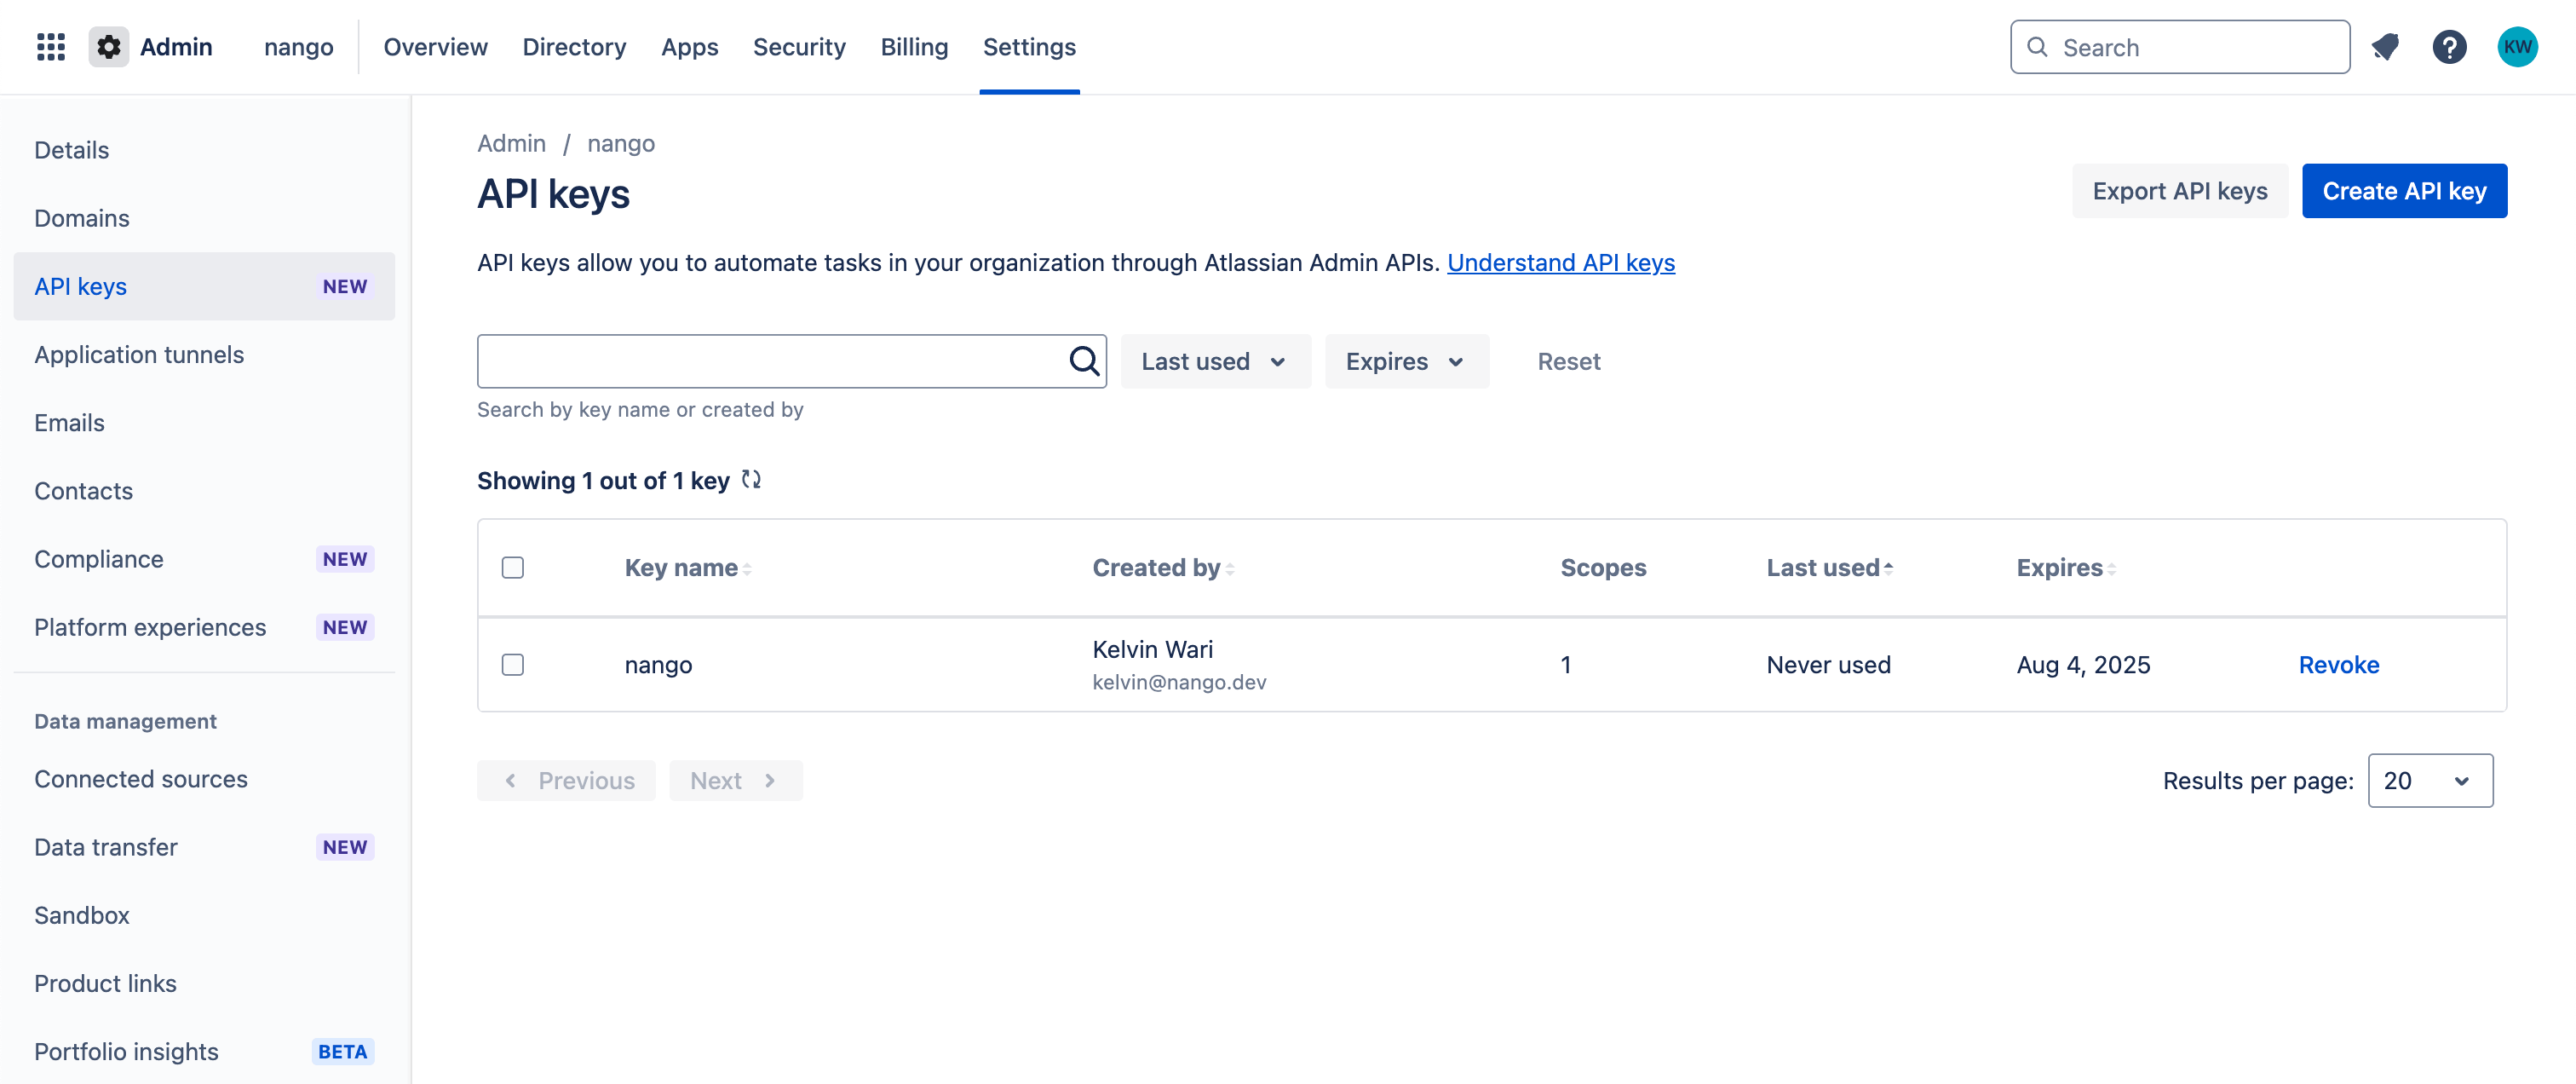
3. Navigate to **Settings** > **API keys**.
4. If this is your first **API key**, click **Create your API Key**. If you've already created **API keys** before, click **Create API key** in the top-right corner of the page.
 4. Choose one of the following options:
* **To create a scoped key**: Click **API keys with scopes**, then click **Next**.
* **To create an unscoped key**: Click **API keys without scopes**, then **Next**.
4. Choose one of the following options:
* **To create a scoped key**: Click **API keys with scopes**, then click **Next**.
* **To create an unscoped key**: Click **API keys without scopes**, then **Next**.
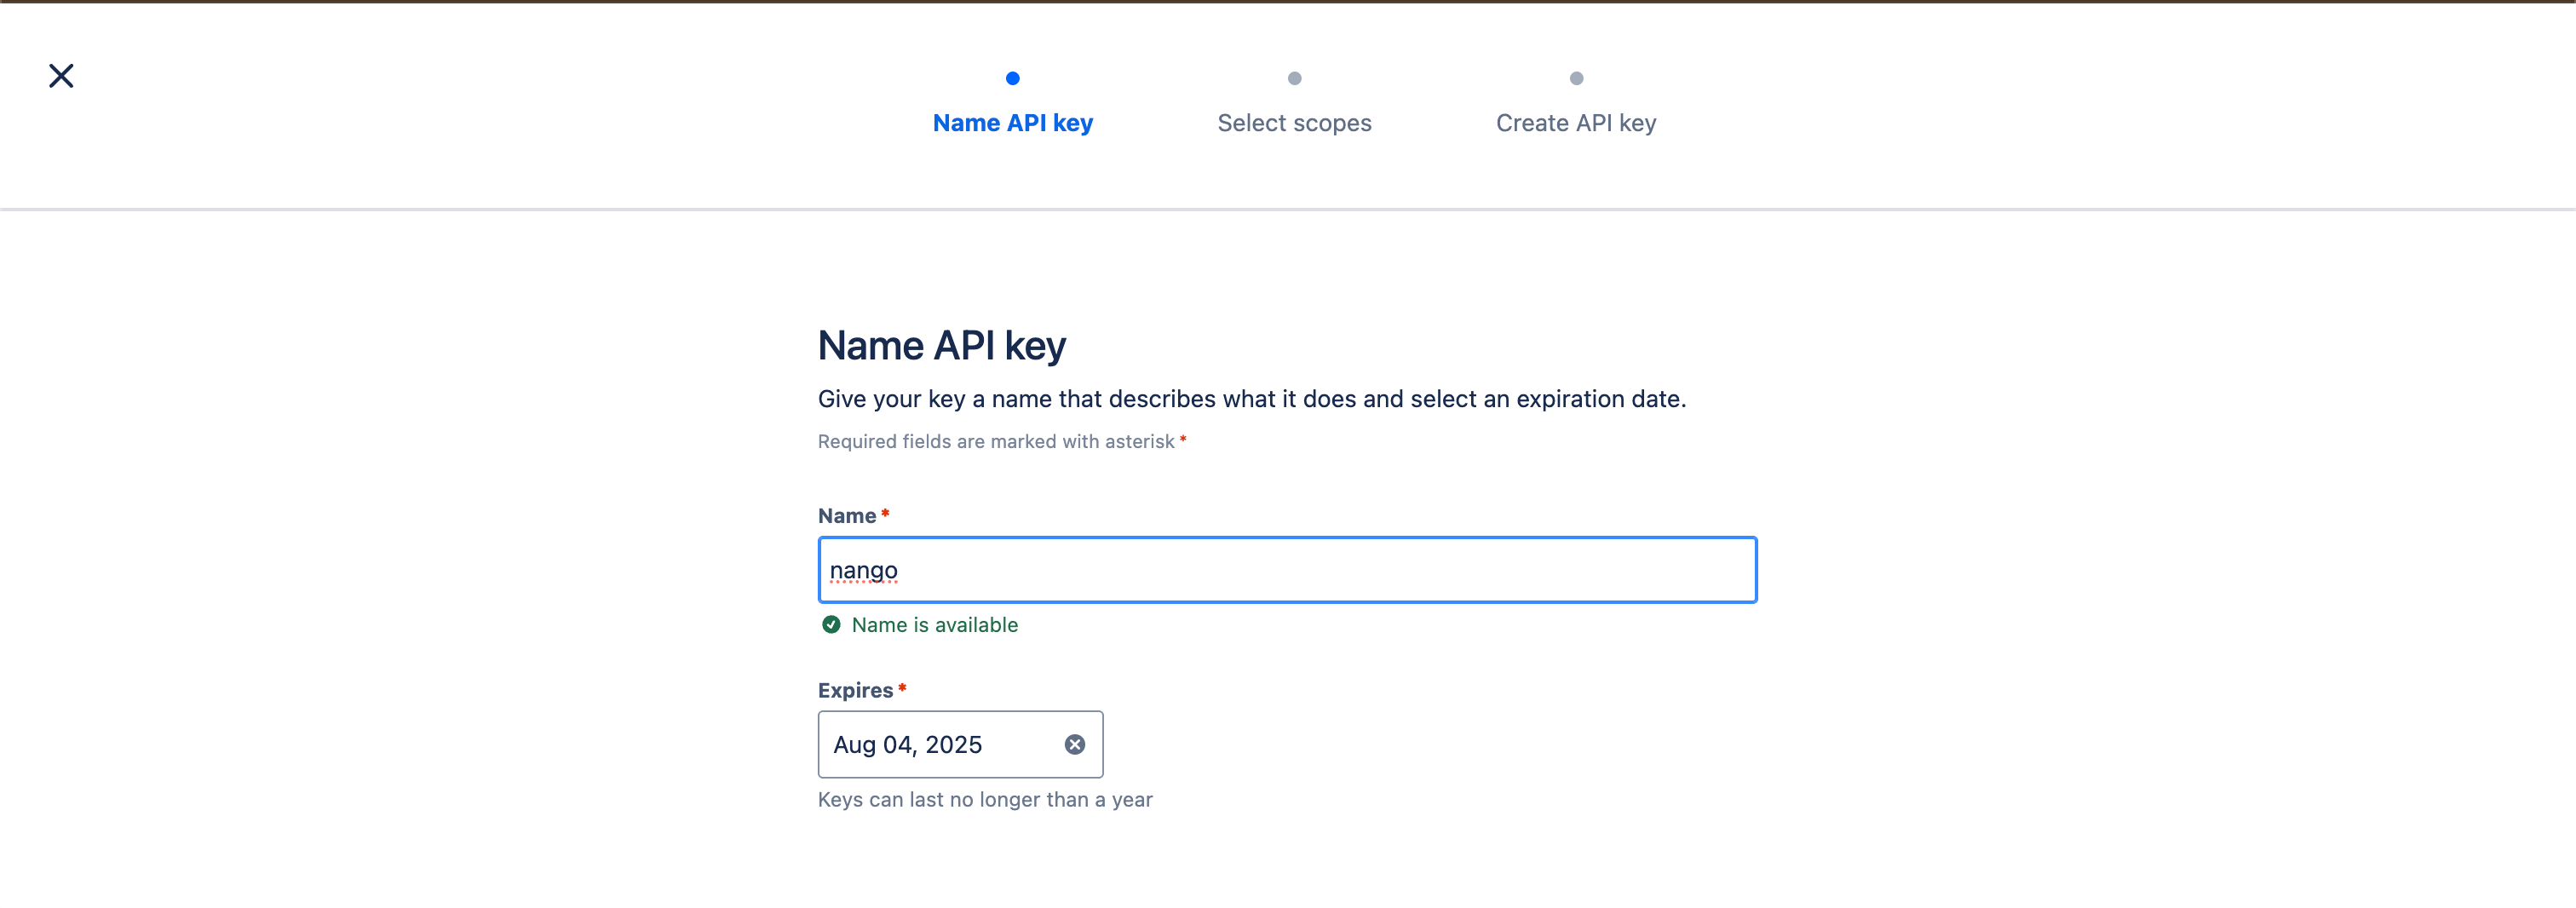
 5. Enter a **Name** for the key that helps identify its purpose (e.g., `"User Sync Script"`).
6. Select an **Expiration Date** (API keys can last a maximum of **1 year**).
5. Enter a **Name** for the key that helps identify its purpose (e.g., `"User Sync Script"`).
6. Select an **Expiration Date** (API keys can last a maximum of **1 year**).
 7. (For scoped keys only) Under **Select scopes**, choose the appropriate [permissions](https://developer.atlassian.com/cloud/admin/scopes/) for your use case.
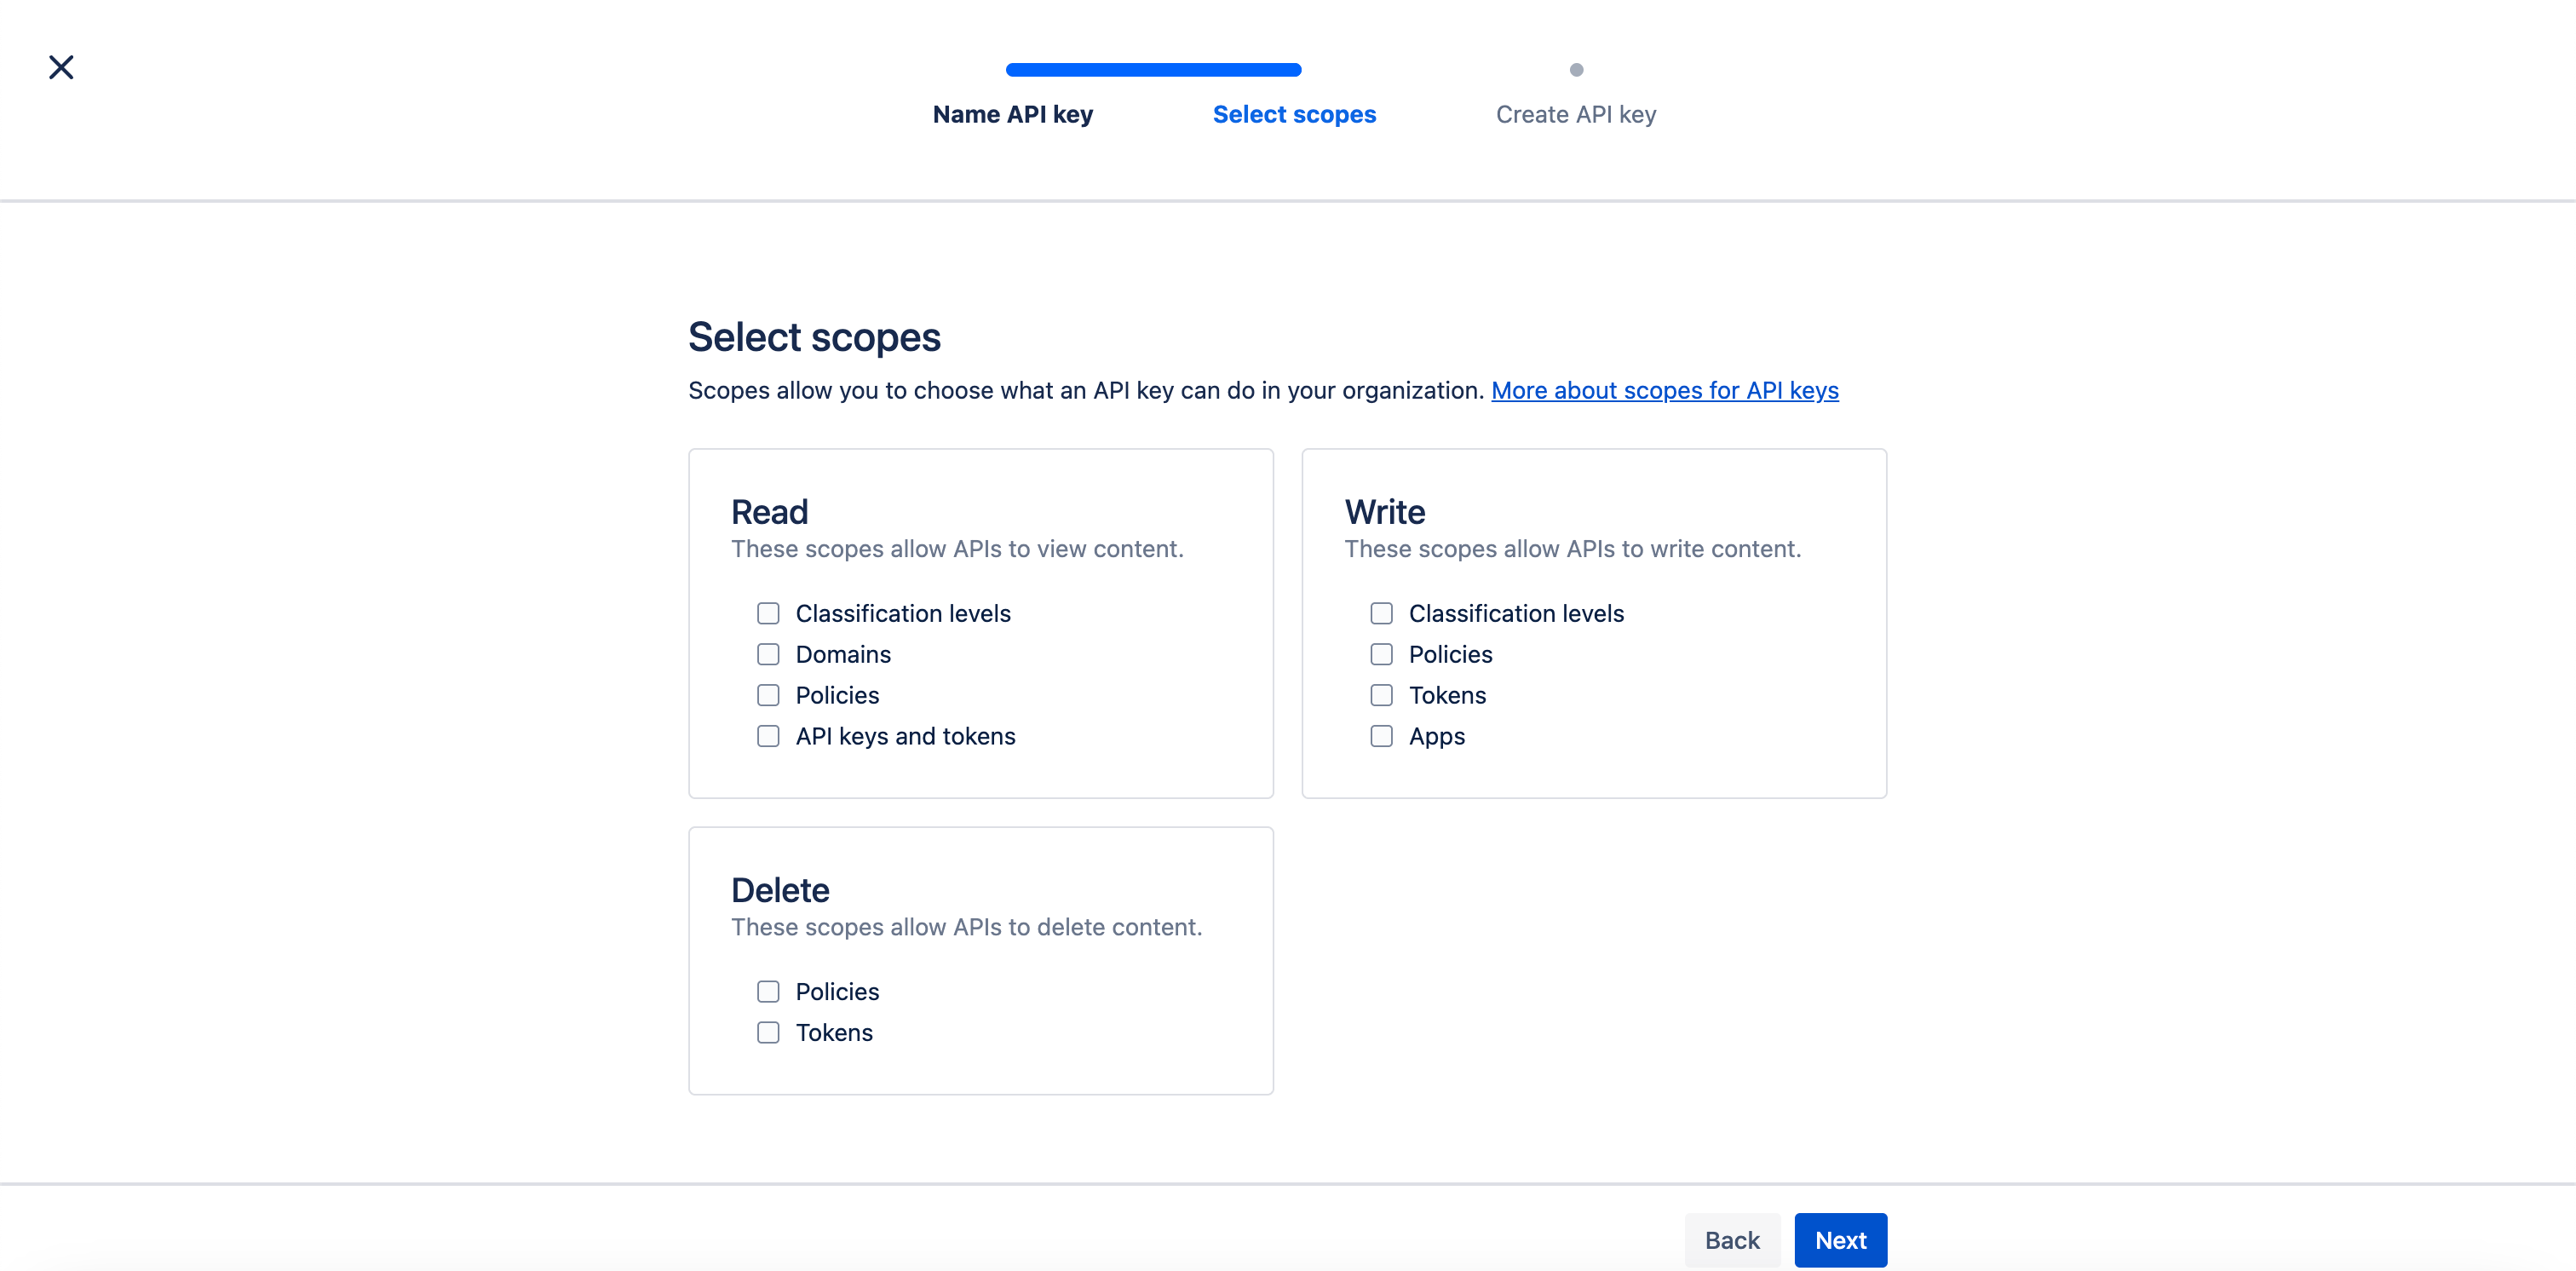 8. Review all details and selected scopes (if applicable).
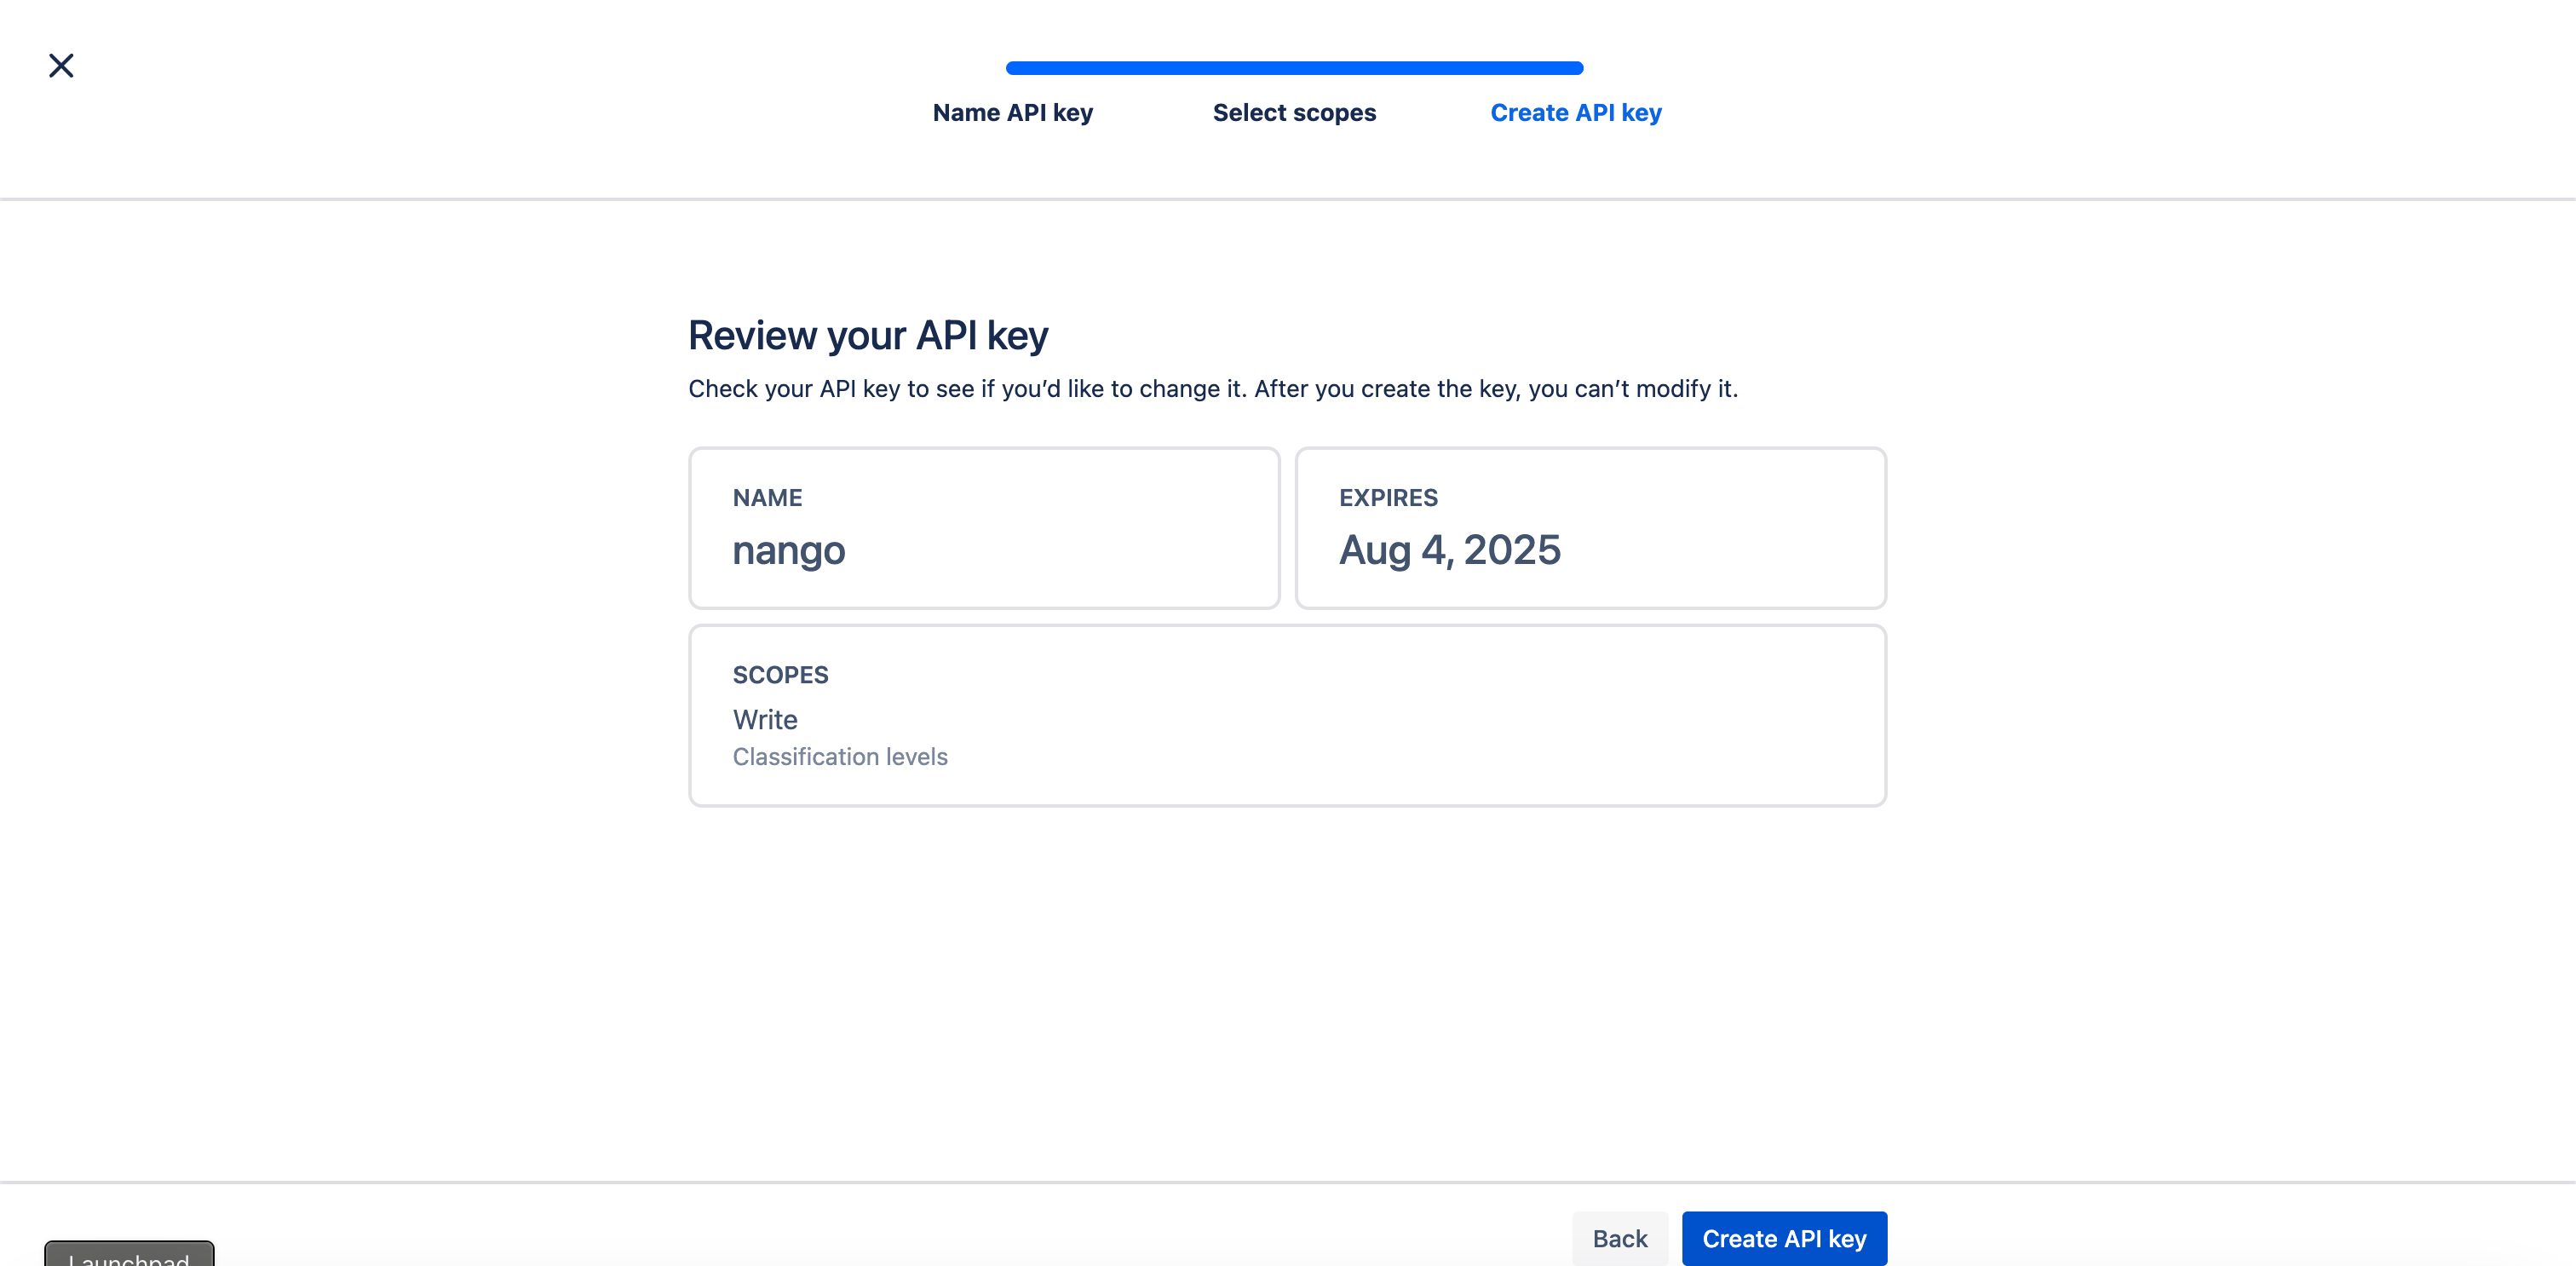 9. Click **Create API Key**.
10. Copy and securely save the **API Key** when prompted — you won’t be able to view it again later.
11. Copy and save the **Organization ID**. You can optionally enter this in the Connect UI.
#### Step 2 Enter credentials in the Connect UI
Once you have your **API Key**:
1. Open the form where you need to authenticate with Atlassian Cloud Admin.
2. Enter your **API Key** in its respective field.
3. Optionally enter your **Organization ID** in the correct field.
4. Submit the form, and you should be successfully authenticated.
9. Click **Create API Key**.
10. Copy and securely save the **API Key** when prompted — you won’t be able to view it again later.
11. Copy and save the **Organization ID**. You can optionally enter this in the Connect UI.
#### Step 2 Enter credentials in the Connect UI
Once you have your **API Key**:
1. Open the form where you need to authenticate with Atlassian Cloud Admin.
2. Enter your **API Key** in its respective field.
3. Optionally enter your **Organization ID** in the correct field.
4. Submit the form, and you should be successfully authenticated.
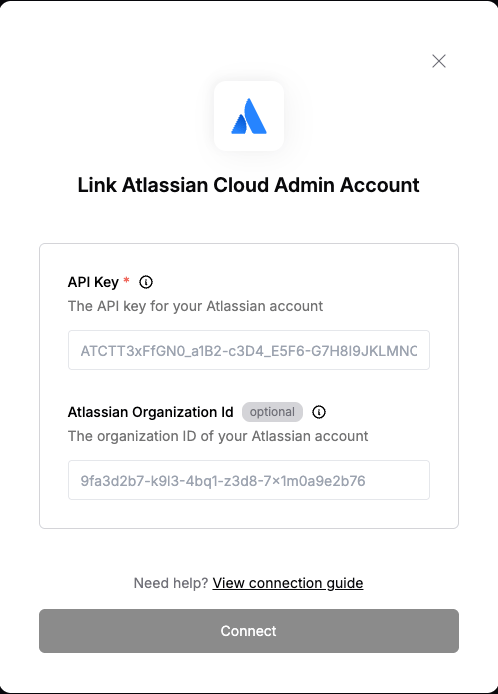 You are now connected to Atlassian Cloud Admin.