> ## Documentation Index
> Fetch the complete documentation index at: https://nango-wari-migrated-bigcommerce-docs.mintlify.site/llms.txt
> Use this file to discover all available pages before exploring further.
# Shopify (api key) - How do I link my account?
# Overview
To authenticate with Shopify, you will need:
1. **Shopify Domain** - The domain associated with your Shopify account.
2. **API Access Token** - The API access token generated after installing an app in your Shopify store.
This guide will walk you through finding your **Shopify Domain** and generating your **API Access Token** within Shopify.
### Prerequisites:
* You must have an account with Shopify.
* Custom app development must be activated in your Shopify admin account.
### Instructions:
#### Step 1: Finding your Shopify Domain
1. Sign in to your [Shopify](https://www.shopify.com/) account.
2. Your **Shopify Domain** is the text found after the URL of your store in the address bar. For example, in `https://admin.shopify.com/store/6nzh0y-y6`, the domain is `6nzh0y-y6`.
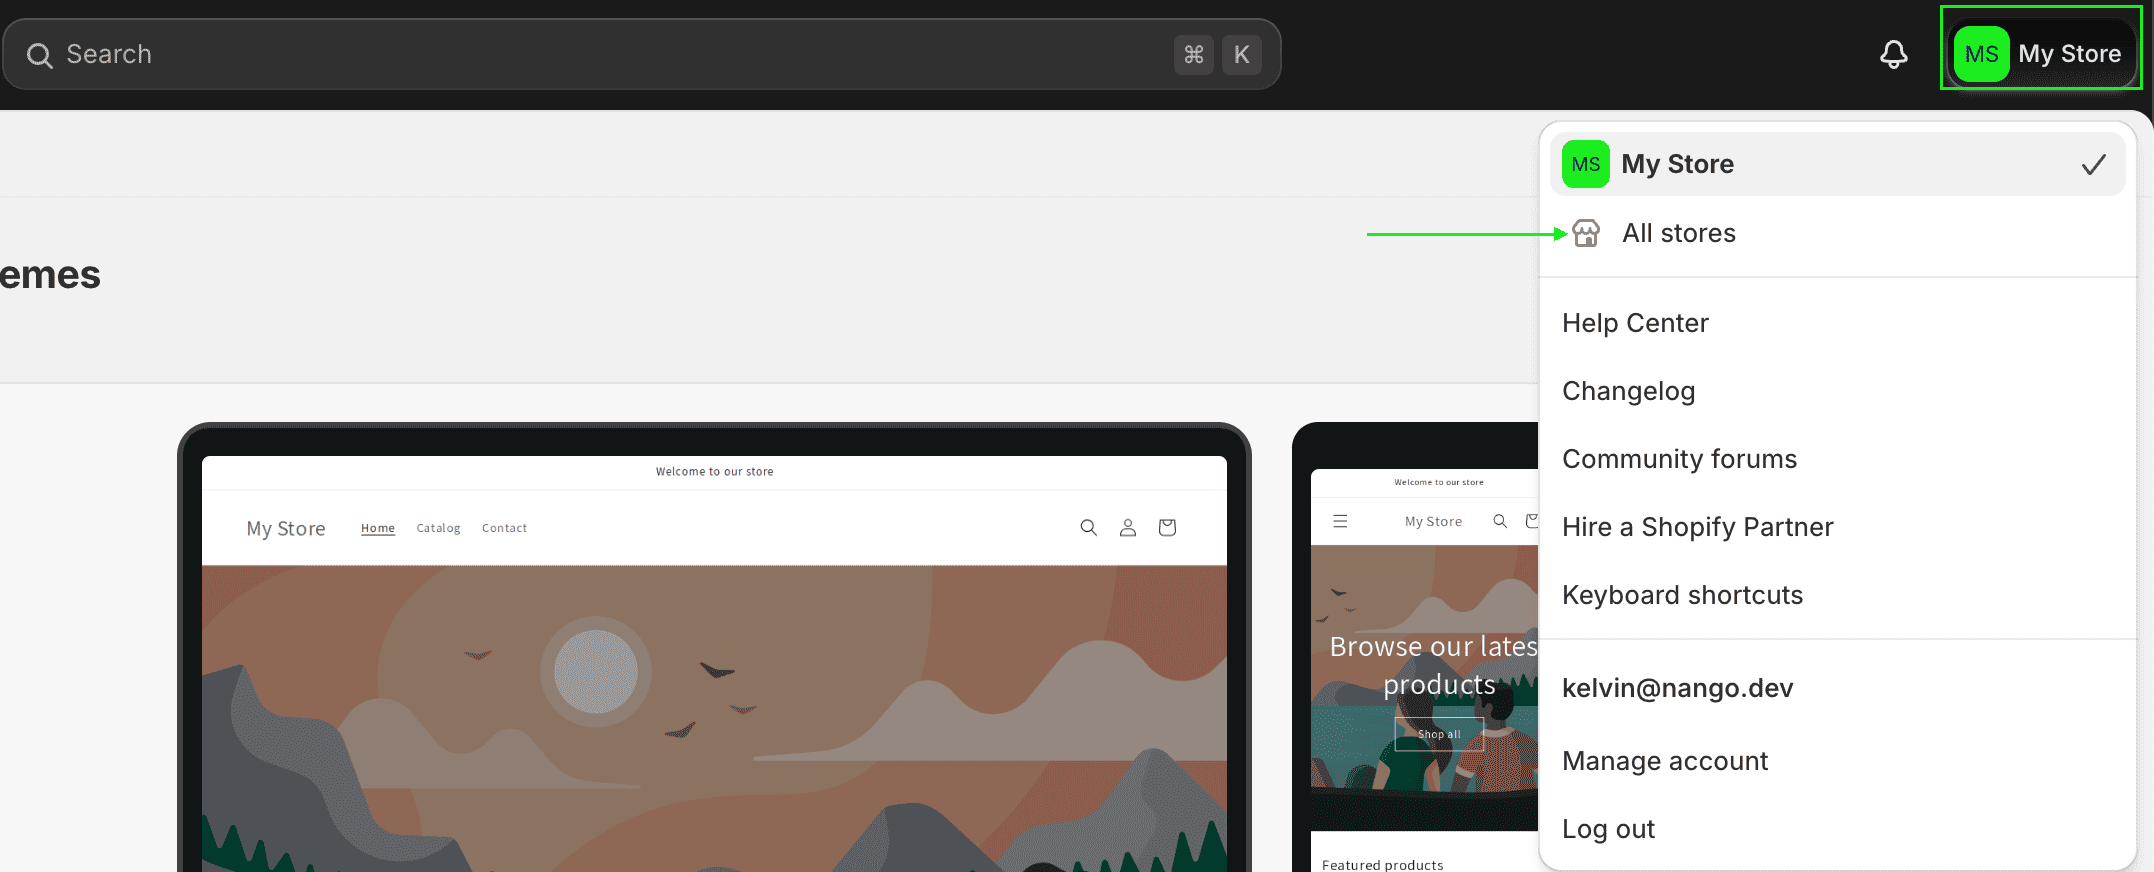
3. You can also click on your profile in the top right corner, then select **All Stores** to view the list of stores associated with your account.
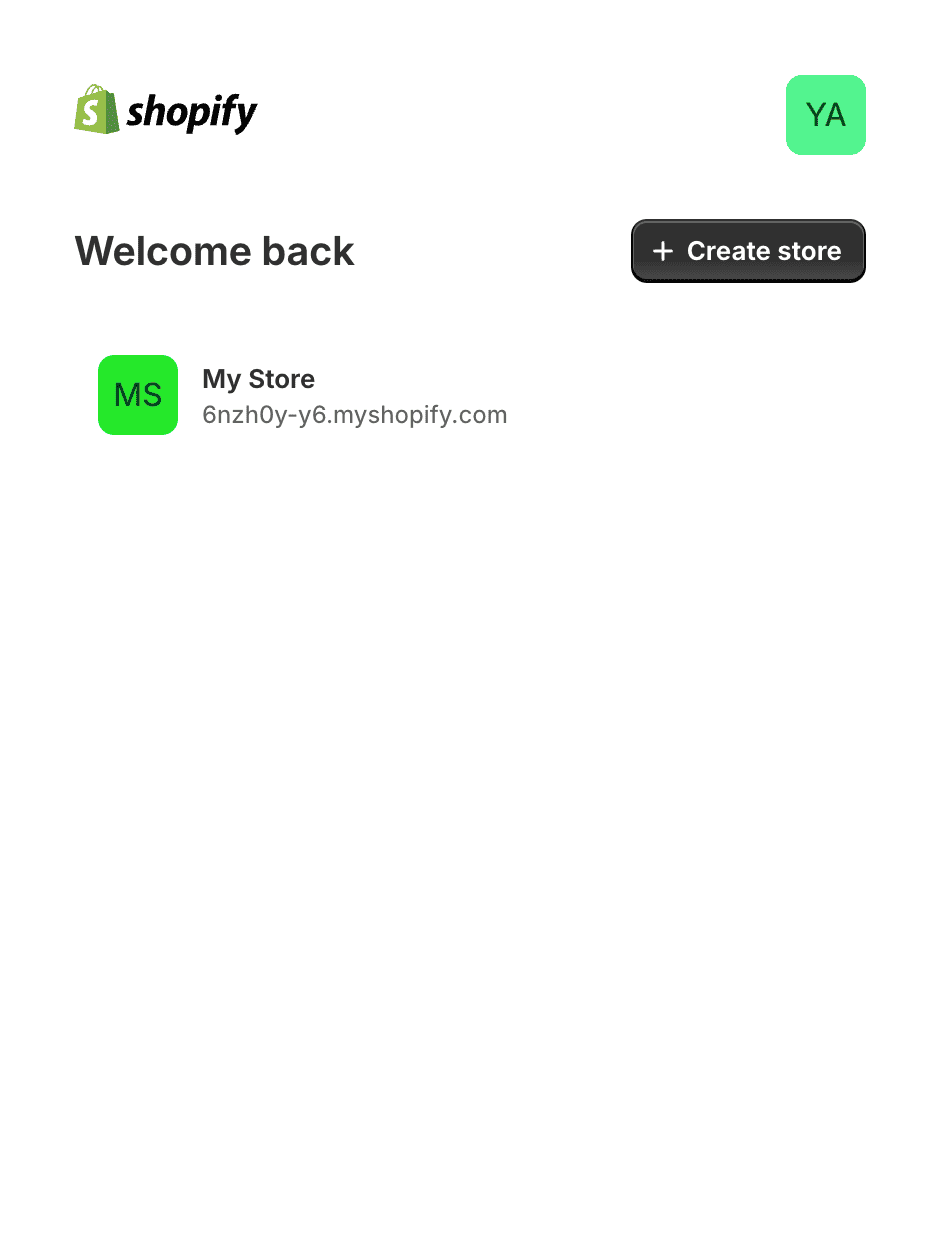
 4. From the displayed list, your **Shopify Domain** is the value before `myshopify.com`.
 #### Step 2: Generating Your API Access Token
* After you've [activated custom app development](https://help.shopify.com/en/manual/apps/app-types/custom-apps#enable-custom-app-development), you can create and install a custom app in your Shopify admin.
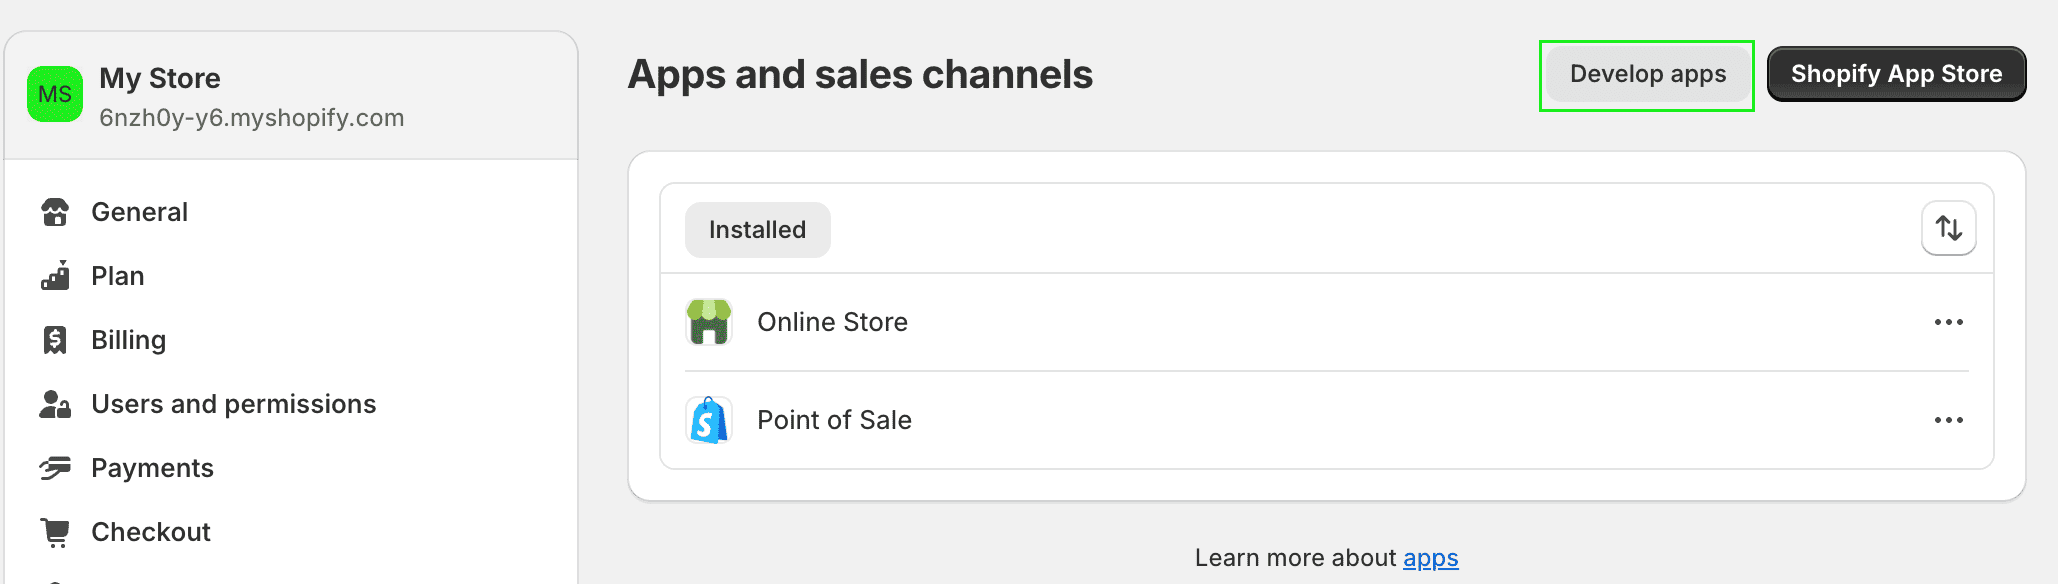
1. From your Shopify admin, go to **Settings** > [Apps and sales channels](https://admin.shopify.com/settings/apps).
2. Click **Develop apps**.
#### Step 2: Generating Your API Access Token
* After you've [activated custom app development](https://help.shopify.com/en/manual/apps/app-types/custom-apps#enable-custom-app-development), you can create and install a custom app in your Shopify admin.
1. From your Shopify admin, go to **Settings** > [Apps and sales channels](https://admin.shopify.com/settings/apps).
2. Click **Develop apps**.
 3. Click **Create a custom app**.
4. In the modal window, enter the **App name** and select an **App developer**. The app developer can be the store owner, or any staff or collaborator account with the **Develop apps** permission.
3. Click **Create a custom app**.
4. In the modal window, enter the **App name** and select an **App developer**. The app developer can be the store owner, or any staff or collaborator account with the **Develop apps** permission.
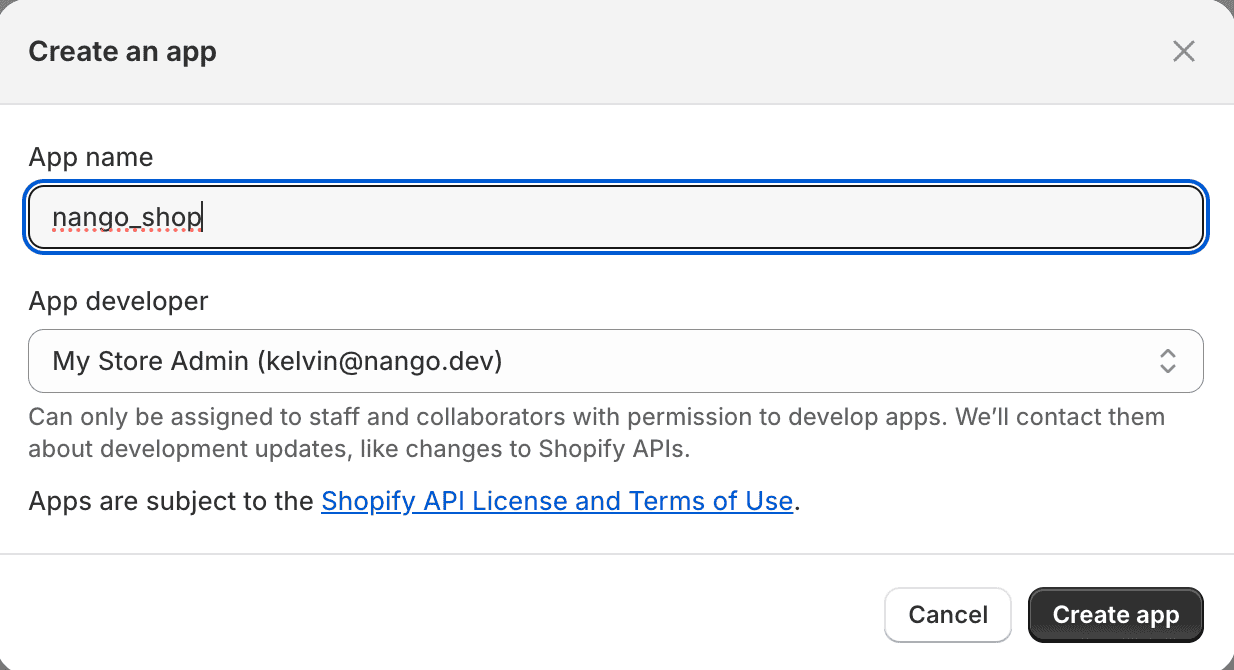 5. Click **Create app**.
* After you create a custom app, you can assign API scopes to it. A custom app can have **Admin API** scopes, **Storefront API** scopes, or both, depending on the requirements of the app. You need to select at least one scope before you install the app.
6. In the **Overview** tab, select at least a single scope from either **Admin** or **Storefront** API scopes, or both, depending on the app's requirements.
5. Click **Create app**.
* After you create a custom app, you can assign API scopes to it. A custom app can have **Admin API** scopes, **Storefront API** scopes, or both, depending on the requirements of the app. You need to select at least one scope before you install the app.
6. In the **Overview** tab, select at least a single scope from either **Admin** or **Storefront** API scopes, or both, depending on the app's requirements.
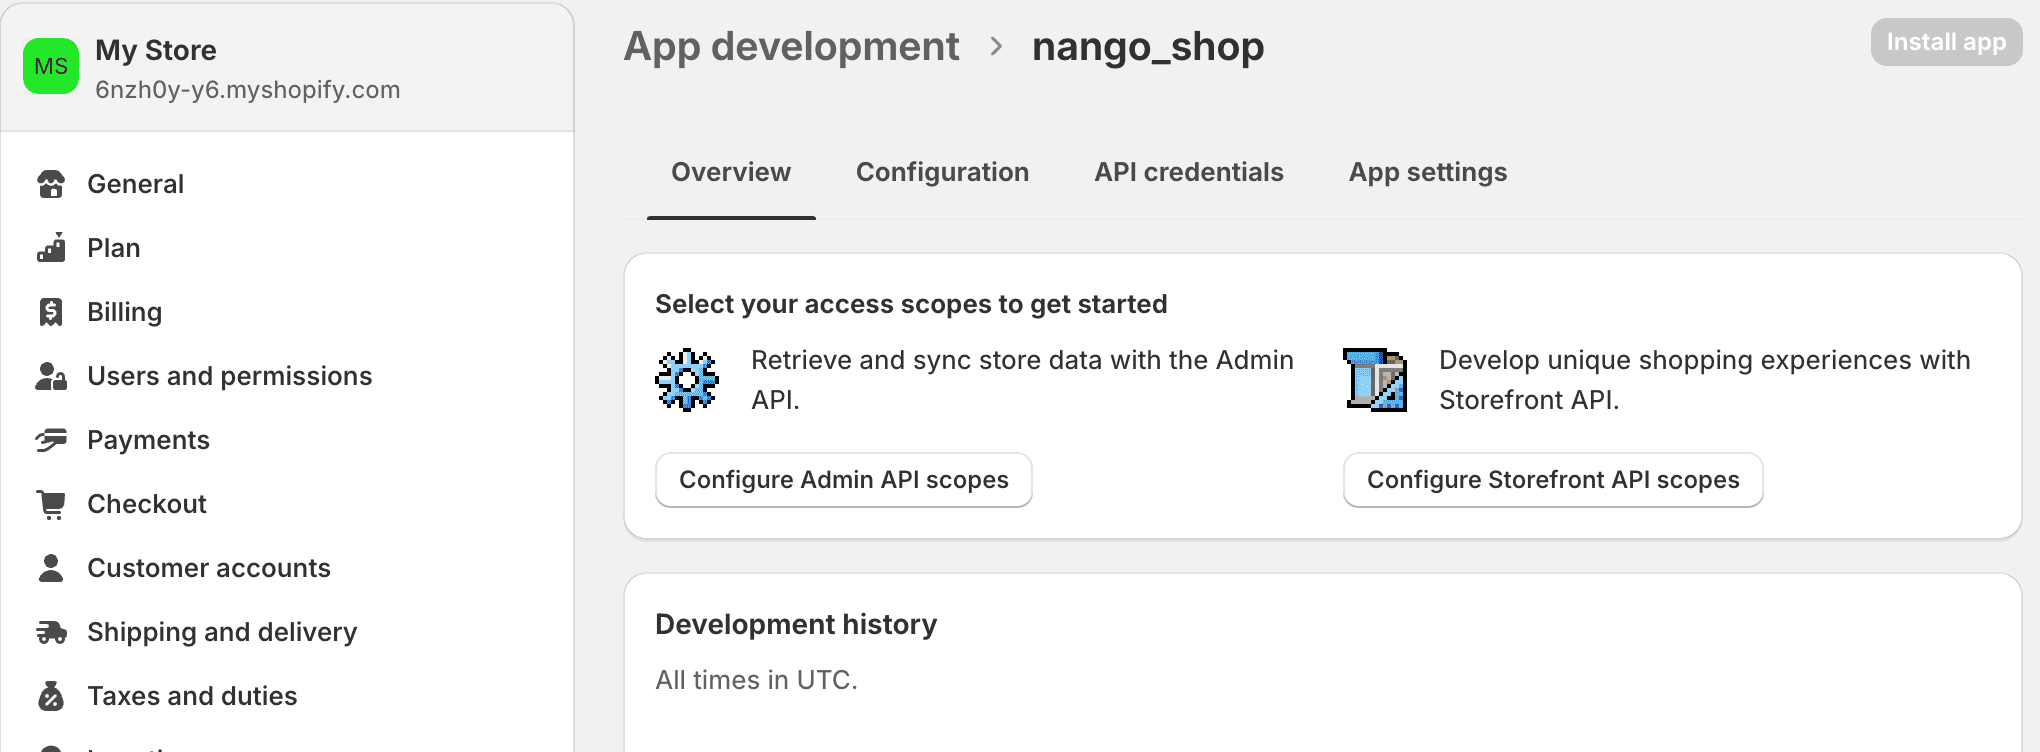 7. Click **Install app**.
8. In the modal window, click **Install**.
7. Click **Install app**.
8. In the modal window, click **Install**.
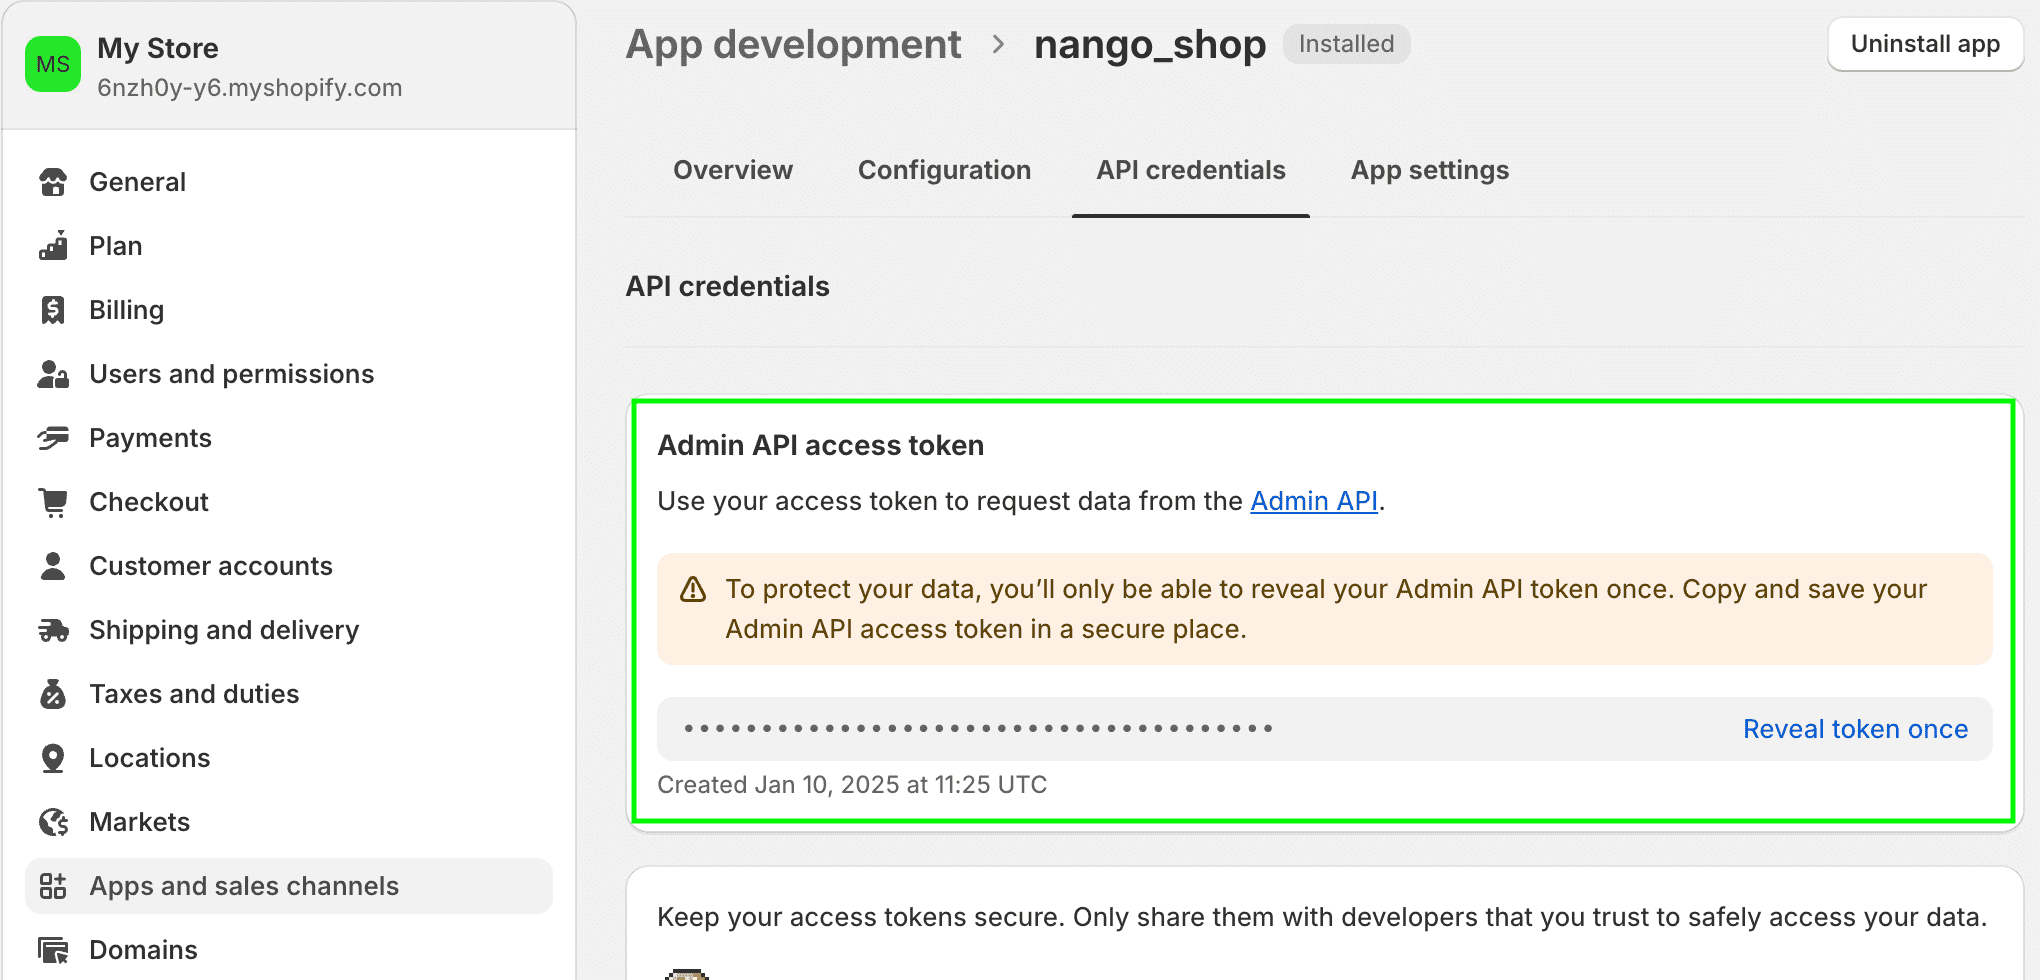
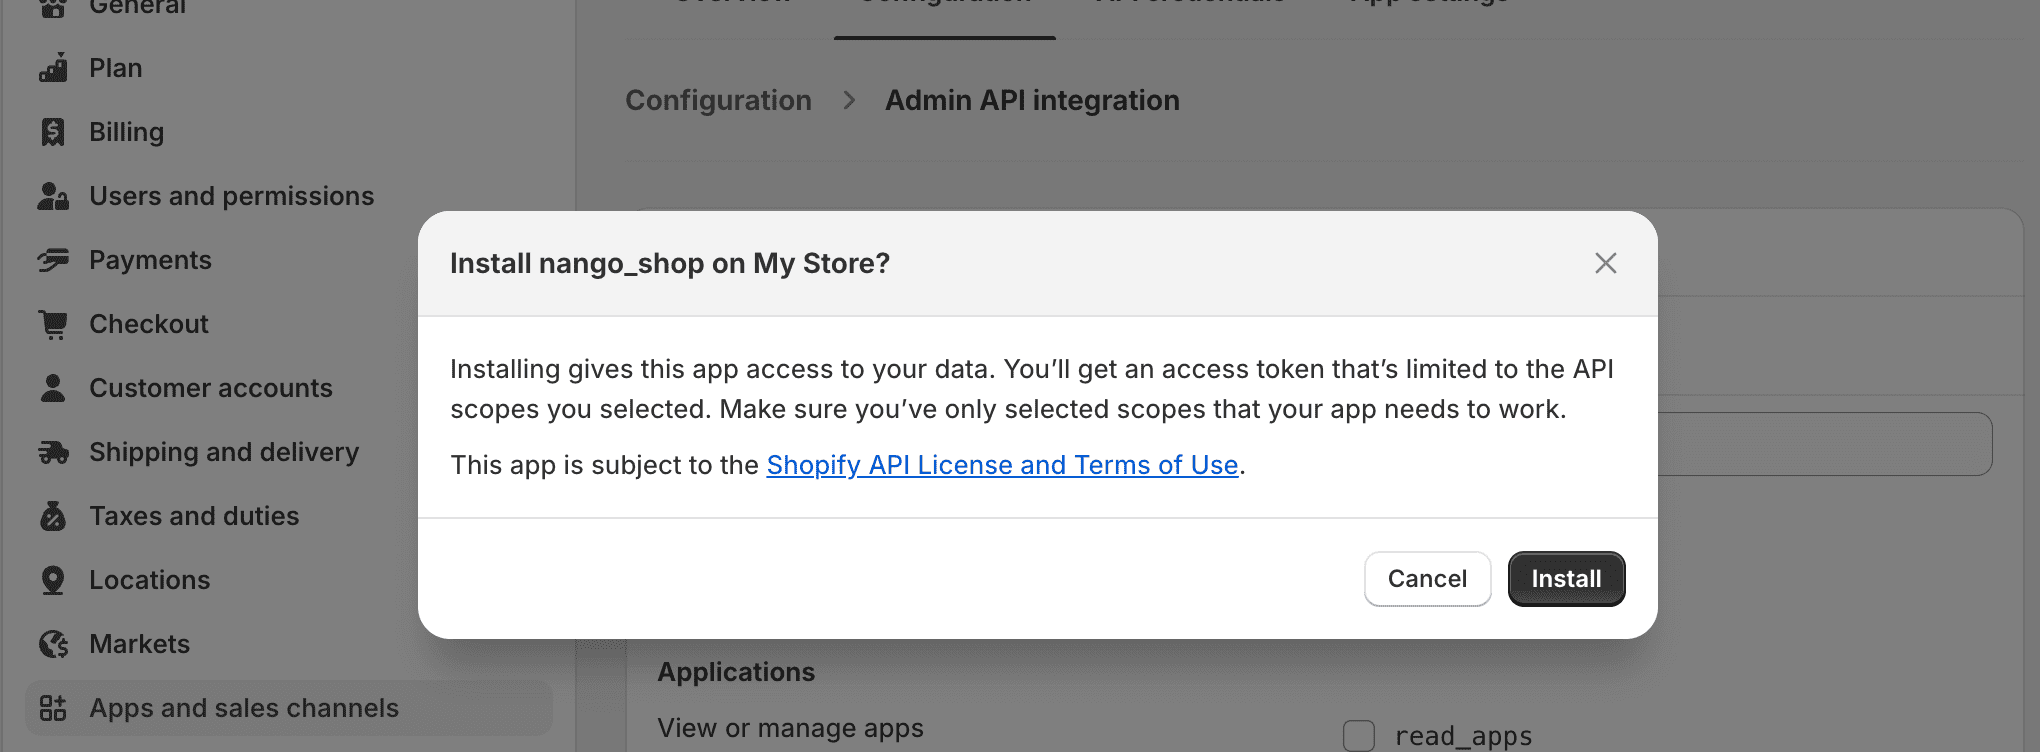 9. Once your custom app is installed, your **API Access Token** will be generated.
 #### Step 3: Enter credentials in the Connect UI
Once you have your **Shopify Domain** and **API Access Token**:
1. Open the form where you need to authenticate with Shopify (api key).
2. Enter the **Shopify Domain** and **API Access Token** in their respective fields.
3. Submit the form, and you should be successfully authenticated.
#### Step 3: Enter credentials in the Connect UI
Once you have your **Shopify Domain** and **API Access Token**:
1. Open the form where you need to authenticate with Shopify (api key).
2. Enter the **Shopify Domain** and **API Access Token** in their respective fields.
3. Submit the form, and you should be successfully authenticated.
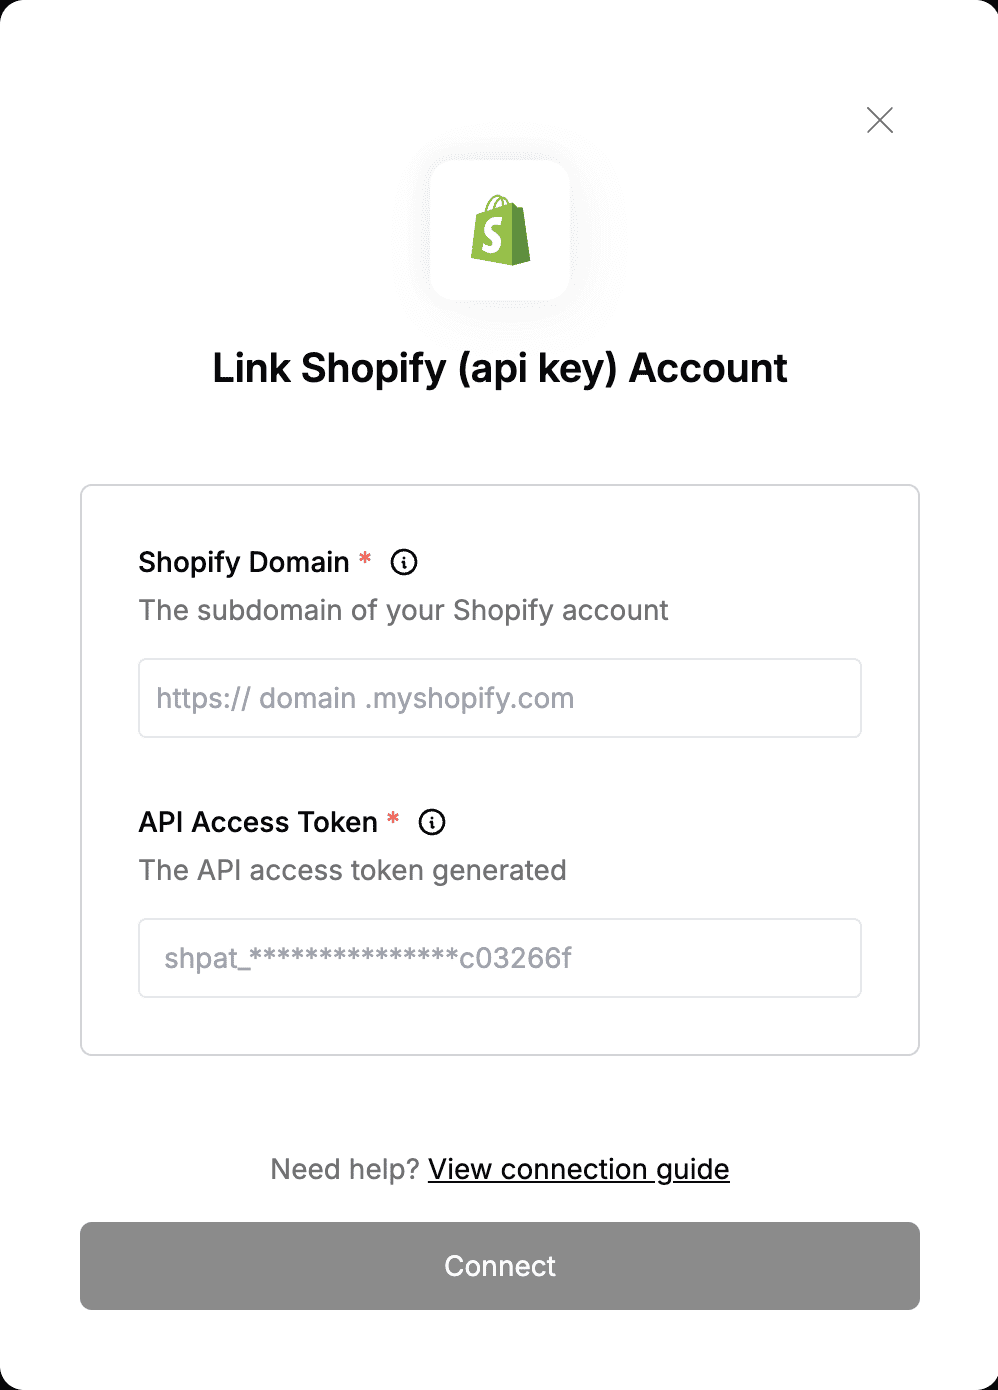 You are now connected to Shopify (api key).